Performance is crucial for any website, and a website built with the Drupal or WordPress content management system (CMS) is no exception. Search engines prioritize mobile website performance, and users abandon websites that load too slowly, so ensuring fast loading speeds is essential.
While Drupal and WordPress offer a solid foundation, adding features, themes, and modules/plugins can slow down your site. In this blog post, we’ll explore strategies to improve the performance of your Drupal and WordPress sites and some pitfalls to avoid.
Measuring Performance with Google Pagespeed Insights
How fast is your site? Google Pagespeed Insights is an excellent tool for measuring performance. It provides Core Web Vitals and an overview score with recommendations for improvement. Focus on achieving a general site performance score of 80+ and passing all Core Web Vitals.
Strategies for Boosting Pagespeed
1. Cache and Aggregate
Caching can significantly enhance performance. WordPress Performance plugins can handle CSS/JS caching, while full-page and database query caching require additional plugins and fine-tuning for optimal results. Drupal, however, has these performance enhancements already baked into the CMS.
Consider using performance-oriented plugins on your WordPress site. Autoptimize, Phastpress, and Hummingbird are popular options that can significantly enhance site performance.
Drupal handles this with its internal caching. Enable Drupal’s built-in caching for all your pages, blocks, and views, and enable CSS and JavaScript aggregation on the Performance page.
These plugins and configurations may require platform-specific adjustments or specific settings for certain hosting environments, so testing is crucial.
2. Choose a Good Hosting Environment
Shared website hosting can be affected by other websites, adversely impacting your page speed. Dedicated or managed hosting environments offer better performance at a reasonable cost. Providers like Pantheon offer dedicated hosting for Drupal and WordPress, whereas Acquia provides dedicated Drupal hosting. WPEngine and Kinsta provide dedicated WordPress hosting. Any of these managed hosting providers are an excellent starting point.
Managed hosting environments often provide their own caching mechanisms that are worth exploring for their known performance benefits.
Varnish, for example, can dramatically improve performance. Consider Memcached or Redis for faster, more scalable caching — especially with complex Drupal or WordPress sites.
3. Image Size Matters
Even Drupal and WordPress have limits when compressing large images. Upload images close to the required size or aspect ratio. Configuring Drupal and WordPress to resize images automatically is essential for a fast experience.
4. Optimize Images
WordPress and Drupal can generate adequately sized images for your website, but newer formats like SVG, WebP, and Avif offer better compression without compromising quality.
WordPress plugins like WebP Express, ShortPixel, SVG Support, and Safe SVG can reduce image size quickly and offer SVG support.
In Drupal, the SVG Image module lets you add support for SVG files to the standard image field. It also facilitates web image format conversion through a filter within Drupal core image styles, which you can configure according to your needs.
It’s equally important to ensure the image loads are sized appropriately for the device accessing your site. Whether using Drupal or WordPress, you’ll want to ensure that responsive images are set in the SRCSET or your IMG tag. WordPress typically adds responsive images by default. You can manipulate these defaults using the wp_calculate_image_srcset() and wp_calculate_image_sizes() filters outlined within the WordPress Developer Resources. In Drupal, we do this using the module Easy Responsive Images.
Lazy loading images is an effective way of deferring the load of images until they’re about to enter the viewport.
Optimizing video embeds is as effective as optimizing your images. With Drupal, we do this using the Lite Youtube Embed module, which allows the videos to be lazy loaded.
5. Avoid Too Many Scripts
Google Tag Manager makes it easy to add multiple scripts for user journey tracking — but too many scripts can hinder performance. Regularly review and remove unnecessary third-party scripts to optimize site speed. We wrote a blog post on how to improve performance in Google Tag Manager.
6. Copy/Pasting? Clean Your Content
When copying and pasting text from another document, clean out extra metadata and styling. Drupal and WordPress can clean some of it, but it’s best to avoid loading unnecessary content. When possible, always paste text without formatting.
7. Update, Update, Update
Regardless of which platform you choose, it’s critically important to keep the content management system and its corresponding modules or plugins up-to-date. Drupal core and modules and WordPress core and plugin updates can offer performance and security fixes.
Be sure to keep PHP on the most recent stable version supported by Drupal or WordPress to benefit from performance and security fixes.
Strategies to Avoid
1. WordPress Page Builders
Avoid using page builders on the built-in WordPress block editor (Gutenberg). Gutenberg has improved site editing to the point where additional page builders — such as Elementor or Beaver Builder — are rarely needed. They can negatively impact site performance.
In Drupal, however, there is no equivalent page builder. It is important to use themes and modules that do not provide unnecessary bloat.
2. Excessive Plugins
Many Drupal modules or WordPress plugins can have unnecessary features that slow down your site. If you only need one feature from a module or plugin that loads many others, consider finding a more lightweight alternative. The functionality provided by that one feature within that module or plugin may be able to be written within your theme or a custom Drupal module or WordPress plugin for a more performant and secure site.
It’s always essential to audit your Drupal modules and WordPress plugins regularly. We would recommend quarterly. Disable unnecessary Drupal modules and WordPress Plugins that consume resources, and consider removing them from the code base completely where possible.
3. Frameworks and Bloated Themes
Adding frameworks like Bootstrap, icon packs, and fonts to a theme can increase CSS and JS bundle size. If you can’t optimize these effectively, stick to creating what you need on an existing theme. Less is definitely more in this case.
The payload of CSS for what loads above the fold on a page can be managed using Critical CSS.
Some parting advice:
Write efficient custom code in your theme and Drupal module or WordPress plugin to ensure it is optimized for performance. If you’re a developer, disable caching and aggregation when developing to avoid issues.
As always, test, test, and test again. Test the site under heavy load to simulate real-world scenarios to uncover bottlenecks, and use third-party services such as New Relic to help dig into these bottlenecks.
Drupal and WordPress provide a solid foundation for performance, but modules, plugins, themes, and functionality can reduce site speed. Monitoring performance is crucial — and pairing it with continuous optimization is essential. For more advanced assistance, feel free to get in touch; we’d be happy to provide expert advice, and even a few performance improvements.
Did you know that Shane is our very first Kanopi employee, ever? If you’ve enjoyed reading his post, please check out his other great works in our blogosphere, such as:
At the keynote speech at DrupalCon 2022, Dries Buytaert, the founder of Drupal, presented the idea of “Starter templates” to help ambitious site builders quickly and easily create solutions. From that, the Distributions and Recipes initiative was born.
Drupal recipes are the foundation for the new Starshot Initiative, which aims to make Drupal easier to use and out of the box for all users. It took a couple of years, but Recipes have been added to Drupal core in 10.3 as Experimental APIs.
(If you prefer webinars, I gave a webinar on Recipes, Starshot, and the future of Drupal. Check it out.)
The Problem
For decades, developers have been packaging functionality together for Drupal to create different solutions, such as eCommerce stores, blogs, LMS, social media, and publishing sites. Many approaches were taken, each with its own pain points.
Installation Profiles
You can only start with them.
Once you start with them, you are stuck with them forever!
You can’t change to a different install profile.
Distributions
Complex dependencies that need to be maintained
Updates could break customizations
Would be hard to get solutions into Drupal core.
Features and Custom modules
As with the above, these often become complex and hard to manage.
Need update hooks or manual steps to alter core and other contrib module’s configuration.
The Solution
An issue has been created to add four new APIs to Drupal that will allow Recipes to be applied to Drupal. These recipes allow Drupal module automation, theme installation, and configuration at any time during the lifecycle of a Drupal site. They can install modules, import configuration, alter existing configuration, and even provide content to a Drupal site. Recipes are ephemeral; once applied, the results become the site’s responsibility.
What makes up a Drupal Recipe?
A recipe needs only a folder with the recipe’s name, which contains a recipe.yml file. Beyond that, optional items are a /config folder, a /content folder, and a composer.json file. You can also include README.md and LICENSE.md files like a module or theme.
Once you’ ha’ve patched your Drupal core version, you can use the internal script to apply a recipe to an existing site. On your command line, run the following command from your webroot:
This command uses PHP to find the “recipe” script in core/scripts/drupal. Then list the full path to the recipe. The -v flag has the recipe runner output the application steps as they happen on the command line.
Once you apply the patch, you will get Drupal recipes from core! Core’s recipes currently include the Standard installation profile recreated as recipes. You can apply Standard and get all the functionality or apply them individually as needed. They were created to be very atomic — so that you can choose your own adventure.
Applying a recipe using Quick Start
Another Drupal script allows you to install Drupal from a recipe. When you do this, you do not start from an install profile! This is a new change. Previously, you at least had to start with a minimal profile; now, that is no longer needed.
If you’re starting a new Drupal install, you can use the following script:
The Recipe API depends on DefaultContent, Action, and Checkpoint. The other three APIs have no interdependencies.
Drupal\Core\Config\Checkpoint
A checkpoint is made for the site’s configuration when a recipe is applied. The recipe runner uses this to revert if the application fails, but there may be other uses for this in the future, like unapplying a recipe.
Drupal\Core\DefaultContent
This API’s code came from the contributed Default Content module. It allows recipes to provide content to Drupal using YAML files.
Drupal\Core\Config\Action
The Config Action API is the magic of the recipe system. It allows you to alter configurations already in a site, including core’s configs!
Drupal\Core\Recipe
Finally, the Recipe API puts it all together and applies the recipe. The recipe runner takes a recipe, and follows the following steps:
Applies dependent recipes
Install modules and themes
Imports configuration from the /config folder
Alters configuration based on actions
Imports content from the /content folder
Deep Dive into an Actual Recipe
This recipe creates two fully configured content types. It includes meta tags, paths, configured admin forms:
name: 'Saplings - Content types'
description: 'Configuration for the Saplings Content types.'
type: 'Site'
# Here we require other dependent recipes.
recipes:
  - saplings-content-base
  - saplings-component-types
# Now we install modules.
install:
  # Core.
  - menu_ui
  - tour
  # Contrib.
  - access_unpublished
  - field_group
  - metatag_open_graph
  - metatag_twitter_cards
  - pathauto
  - publication_date
  - scheduler
  - scheduler_content_moderation_integration
  - schema_article
  - simple_sitemap
  - token_or
  - ui_patterns_layouts
config:
  # Now can import configuration
  import:
    # Core.
    menu_ui: "*"
    # Contrib.
    access_unpublished: "*"
    pathauto: "*"
    # If we only want to import certain configs, we can identify them like this.
    scheduler:
      - scheduler.settings
      - views.view.scheduler_scheduled_content
  # Config actions are where we can change configuration in Drupal
  actions:
    # Set Metatag Home page:
    metatag.metatag_defaults.front:
      simple_config_update:
        tags.canonical_url: '[site:url]'
        tags.description: '[node:sa_description|node:sa_seo_description]'
        tags.image_src: '[node:sa_seo_image:entity:field_media_image:sa_social_media_facebook|node:sa_featured_image:entity:field_media_image:sa_social_media_facebook]'
     tags.og_description: '[node:sa_description|node:sa_seo_description]'
    # Set permissions for anonymous role.
    user.role.anonymous:
      ensure_exists:
        id: anonymous
      grantPermissions:
        - 'access content'
        - 'access sitemap'
        - 'access_unpublished node sa_page'
        - 'access_unpublished node sa_post'
    # Set permissions for content editor role.
    user.role.content_editor:
      ensure_exists:
        id: content_editor
      grantPermissions:
        - 'access administration pages'
        - 'access block library'
        - 'access content overview'
        - 'access environment indicator'
        - 'access environment indicator ribbon'
        - 'access help pages'
        - 'access media overview'
        - 'access media_entity_browser entity browser pages'
        - 'access media_entity_browser_modal entity browser pages'
What are Config Actions?
As you can see in the recipe example above, you can import config from modules and themes, and take action against config that already exists. Config actions are written to make specific changes to config files — including Drupal core configuration files, which previously could only be done through update hooks.
Look for this list to update as the initiative digs into phase 2 and creates more recipes and possibilities.
Available to all config entities
simple_config_update
This is a config action that can be used to make foo: bar type updates to any configuration file.
setThirdPartySetting(s)
The setThirdPartySetting(s) config actions allows recipe authors to set third-party
settings values. Add the ‘s’ to apply multiple third part settings.
ensure_exists
This action can be used to ensure as a user role exists before applying other actions. It helps a recipe not fail if the role does not exist.
create
The create config action can be used to create a config entity, but it is much easier to just put the config file in the /config folder.
Applicable to specific config entity types
addItemToToolbar
Used to add a button to the toolbar of a CKEditor 5 editor.
addToAllBundles
Used to add a field to all bundles of an entity type. Should be used in combination with setComponent(s) below to make sure the field displays on forms and displays.
addNodeTypes, addTaxonomyVocabularies
Used to add editorial workflows to node and taxonomy bundles.
grantPermission(s)
Used to grant permissions to any user.role.* config files. Add the ‘s’ to add multiple permissions.
setComponent(s)
Used to to add fields to an entity’s view or form display configs.
What’s next for Drupal Recipes?
Now that recipes are in Drupal core, the phase 2 of the roadmap will soon be updated. Integration with Project Browser, and recipe creation in Starshot are definitely on the top of the list, but there are lots more things to do. Stay tuned and check out the issue queue to learn more!
Drupal users were delighted when Drupal 10’s release in 2022 introduced many changes and improvements to the platform. Now, the latest version of Drupal, Drupal 11, is available after its launch in August 2024. As a Drupal 7 user, you may be wondering what this means for your website.
Keeping up with new Drupal releases ensures that your site is secure and that it benefits from the latest advanced functionality. Ultimately, this allows you to serve your website’s audience more effectively.
As a marketing manager or CMO for your organization, it’s important to understand the steps of the Drupal migration process so you can effectively work with your developer while they upgrade your site. This guide covers what you need to know to prepare for a Drupal 7 to 10 migration (and an eventual upgrade to Drupal 11).
FAQs about the Drupal 7 to 10 Migration
Let’s start with a few fast facts and frequently asked questions about Drupal 7, 10, and 11.
When was Drupal 7 released?
Drupal 7 was released on January 5, 2011.
How long will Drupal 7 be supported?
Drupal 7’s end-of-life date is set for January 2025. After this time, Drupal 7 will no longer receive many bug fixes or security patches. By staying on Drupal 7, you could also risk having faulty modules. Plus, you won’t be able to take full advantage of the new features available in Drupal 11.
When were Drupal 10 and 11 released?
Drupal 10 was released in December 2022, and Drupal 11 was launched in August 2024.
What new features are included in Drupal 10 and 11?
Drupal 10’s updates reflected ongoing efforts to modernize the back-end editing experience and provide a streamlined front-end user experience. Specifically, Drupal 10 offered these upgrades and new features:
New default administrative theme. The Claro administrative theme is modern, mobile-friendly, and optimized for accessibility.
New default frontend theme. The new Olivero front-end theme also prioritizes accessibility and modernity alongside a streamlined and elegant color palette, form builder, and typography.
Upgrade from CKEditor 4 to CKEditor 5. CKEditor 5 facilitates a streamlined author experience with the ability to track editing histories, collaborate in real time, and easily import content from Word.
More modern JavaScript elements. Drupal 10 swaps large jQuery elements with more performant solutions.
Upgrade from Symfony 4 to 6 and upgrade to PHP 8. This represents a significant improvement to the PHP scripting language.
Drupal 11 builds on these features with additional functionality to improve the development experience with flexibility, streamlined workflows, and better content governance. Developers were especially excited about these new features:
The new experimental Recipes feature, which helps easily apply complex configurations.
Robust content staging through Workspaces tools that allow developers to Stage new content or preview a full site overhaul by using multiple workspaces on a single site.
Single-Directory Components that simplify front-end development.
Drupal 11 will receive new features every six months, so you can expect more exciting features to come.
When should I switch to Drupal 10?
You should consider switching to Drupal 10 as soon as possible to take advantage of the updated features. Plus, you’ll need to upgrade to Drupal 10.3 before you can migrate to Drupal 11. According to Drupal, “Drupal sites running 10.2.x or earlier versions must first update to 10.3.0 or later prior to updating to Drupal 11, because all core updates added prior to 10.3.0 have been removed. If any modules or themes have been removed you may use the respective contributed project instead.”
In addition, Drupal 7 will no longer be supported after January 2025, so it’s a good idea to plan your migration before then.
Steps of the Drupal 7 to 10 Migration
So, what will the Drupal 7 to 10 migration actually look like? It’s recommended to work with a web developer during this stage. This may either be your organization’s internal web developer or a third-party web development firm.
As a marketing professional, you will mainly play a supporting role in the Drupal 10 migration process. You can help ensure that your site’s SEO rankings are maintained, check that your site’s themes and modules are updated regularly, and run regular tests to ensure a high level of performance. The developer will handle the more complex technical aspects of the migration process.
However, it’s still helpful to understand what exactly goes into a migration and how you can support the development team throughout the process.
With that in mind, here are the steps you and the developer will take throughout the upgrade process. These steps will help prepare your site for newer Drupal versions.
1. Audit your Drupal 7 site.
A site audit allows you to optimize your Drupal website for performance and security as well as identify data and content types to migrate to your new site.
During an audit, a developer will identify the following elements to prepare them for the migration:
The content types and structure of your current site. In this stage, you’ll define all of the data that will migrate to the new site and eliminate any broken or unnecessary code.
The functionality of the Drupal 7 site that needs to be recreated in your new Drupal 10 site. The developer will note any features that will have to be manually redeveloped.
2. Identify necessary redirects for content you’re removing from your site to maintain SEO rankings.
Identify top-performing content and determine whether you’ll need to implement a redirect to maintain SEO performance.
3. Create a backup site copy.
This copy will serve as a migration source and provide a resource for you to reference after your new Drupal 10 site goes live. You can compare your Drupal 10 site to the copy to ensure that everything is in the right place and make adjustments as needed.
4. Review hosting for technical requirements needed for Drupal 10.
Ensure your website host can support PHP 8.1’s minimum technical requirement. You can also review your host for performance elements such as speed, security, and reliability.
In addition, your developer will ensure that your host provides options for development workflows and site testing. This allows you to stage your site and test new elements and features without affecting the live production environment.
5. Migrate your site’s content.
Content migration informs the structure of the new site, making it the first step in the migration process. Plan your content strategy by determining which content types you’d like to maintain or alter. Then, your developer will initiate the process of migrating your data to your new Drupal 10 site.
6. Upgrade your themes and modules.
Modules are foundational elements of your Drupal website that extend its functionality. Your developer will take the following steps to upgrade your modules and themes in Drupal 10:
Replace contributed modules with their modern counterparts.
Identify custom modules and code, verify the functionality required in the new site, and rebuild them.
Rebuild the theme using the more modern Twig framework.
7. Finalize migration, deploy, and run tests.
Run both automated and manual tests to check your new site. For example, the Kanopi team uses automated code-checking tools like PHPstan and Drupal Rector. These tools allow you to see if your code is functioning as expected.
We also recommend performing manual tests that replicate the user experience. Test your forms, links, navigation, and other site elements to catch any issues and correct them before promoting your new site to audience members.
How a Drupal development expert can help
As mentioned, working with a Drupal developer will make your migration experience smooth and painless. When finding a Drupal development partner to work with, seek experts that can:
Facilitate a smooth migration process, taking care of the technical details and maintaining data integrity.
Develop custom modules to ensure that your Drupal website has all the features it needs to serve your audience members effectively.
Craft a search-engine-optimized website that helps your content appeal to search engines and visitors.
Implement third-party integrations such as payment processors, security portals, and other tools your organization uses.
Construct a mobile-responsive theme that ensures your website looks and works great on mobile devices.
Provide ongoing support, updating content, implementing security updates, and managing performance upgrades as needed.
When searching for the right Drupal partner, it’s helpful to find an organization with experienced developers who contribute to the Drupal project on an ongoing basis. For example, Kanopi Studios offers Drupal development services for all types of organizations, including nonprofits, corporations, healthcare organizations, and higher education institutions.
Each of our Kanopi team members has an average of 11 years of Drupal development experience and several of them are Acquia-certified. We also are a supporting partner to the Drupal Association and regularly contribute to the Drupal Project.
By following these steps and providing your developer with context and insight into your website strategy, you can make the Drupal 7 to 10 (and eventually 11) migration simple and painless. Contact the Kanopi team today if you’re ready to launch the migration process.
Looking for more Drupal development and migration resources? Check out these Drupal guides:
The Ultimate Guide to Drupal Planning and Development. No matter what version of Drupal you’re currently using, this planning and development guide will help you determine the next steps to take to ensure your site stays updated.
The Top WordPress & Drupal Trends. Want to learn more about the latest trends for top content management platforms like Drupal and WordPress? This guide has everything you need to know.
WordPress Multisite is a configuration that allows multiple WordPress sites to be bundled together into one instance. (And for those who don’t know, a ‘configuration’ refers to the setup and arrangement of settings within a WordPress website. Apologies if I already lost you there!) It shares the same code base and databases, which means that administrators need only one sole login to manage multiple sites — and only one login URL (this is similar to how Drupal’s Domain Access works. Here’s how we used it with a Drupal client).
Configurations like Multisite have become very popular, so we thought we’d write a post that explores the two most common use cases, how we’ve used it for one of our clients, and a few pros and cons to consider as well.
Use cases: functionality and branding
With a diverse range of features like network-wide plugin and theme management, Multisite is a viable option for anyone looking to streamline website administration and reduce overhead costs. For the sake of this post, let’s look at a couple of use cases where it’s particularly helpful:
For managing multiple sites with similar functionality. Plugins can be shared across the subsites — and if there’s custom code, it can easily be accessible. IOCDF (https://iocdf.org) has a Resource Directory that can be shared across its different child sites.
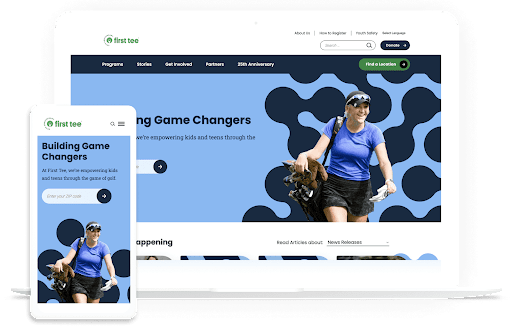
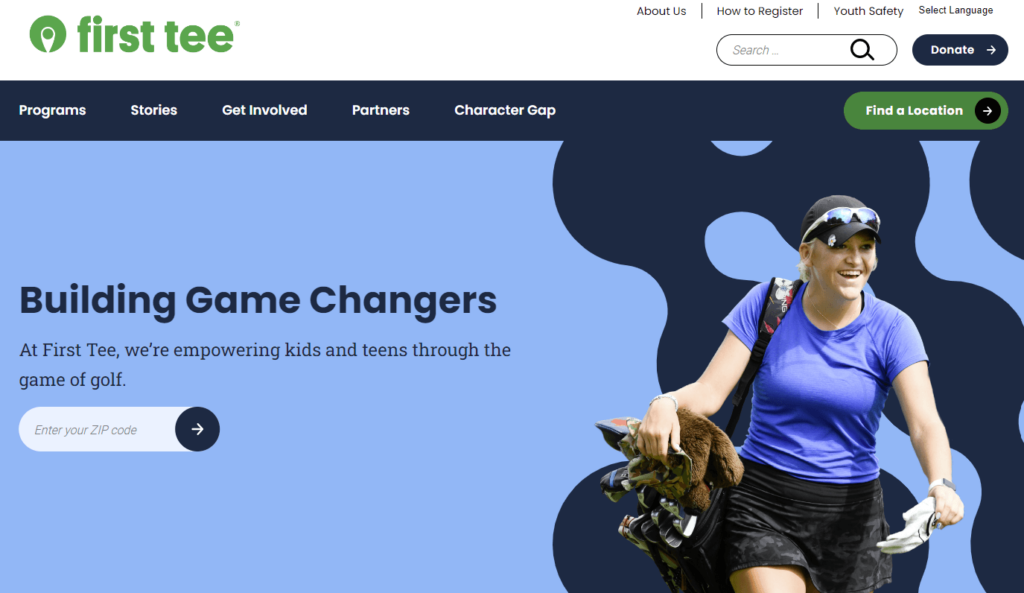
To maintain consistent branding. I would argue that this is its strongest use case — for clients who need to launch multiple websites that share the same branding. In fact, this is the reason we implemented Multisite for our client First Tee when we built them a new WordPress site. I encourage you to check out the full case study here.
WordPress Multisite: the pros…
A shared codebase makes it easier to update themes and plugins. Rather than having to do it across multiple sites, you only have to do it once.
Thanks to the shared codebase, only one sole backup is needed, rather than multiple backups per site.
Plugins for syndication allow for content to be shared across multiple sites in the network.
Administrators only need one login. For many admins, this is reason #1 to seriously consider Multisite.
…and the cons.
If there are too many sites within the network (e.g.: 1000 or more), it can cause database bloat and slow down your server.
If one aspect in a theme is updated, it can potentially cause regressions across sites in the network that share the same theme.
WordPress Multisite requires a ‘Super Admin’ or Network Administrator to effectively manage the network and its sites. The Super Admin has the highest level of administrative control, with the authority to manage sites, install plugins and themes, and grant or restrict permissions across the network. This can sometimes be confusing for regular administrators who may not understand why their permissions are limited.
Not all plugins are compatible with a multisite setup. Also, certain premium plugins may require a license per subsite — the cost of which can quickly add up.
Hosting costs can sometimes increase with Multisite, as the network could potentially use more resources.
Need more help? Our team of seasoned WordPress developers has experience implementing Multisite for our clients, including not only First Tee but also the Children’s Organ Transplant Association, the International OCD Foundation, and others. Whether you’re considering a switch to WordPress or you’re just looking to get more from your existing site, we’d be happy to discuss your options. All you need to do is drop us a line.
When you first designed your nonprofit’s website, you probably thought it was made to last. You chose an evergreen design, incorporated uniform branding, and optimized your donation page to drive conversions. In the excitement of getting your site up and running, you may have let nonprofit website maintenance concerns fall by the wayside.
You might be surprised to learn that the average website lifespan is just two years and one month! After this time, your design could become outdated, your messaging could use a refresh, and your CMS may need a core update.
This guide offers best practices for keeping your nonprofit website in top shape and outlines the benefits of regular website maintenance. Here’s what we’ll cover:
Nonprofit website maintenance is so critical because even minor tweaks to your layout, content, text, and imagery can make all the difference in encouraging someone to donate. Let’s start by reviewing a checklist of maintenance tasks.
Nonprofit Website Maintenance Checklist
What should you check for when performing website maintenance? Use this checklist to ensure you don’t forget anything when refreshing your site:
Nonprofit Website Audit Checklist
Website Strategy
User Experience
Nonprofit Messaging
Social and Events
Multimedia Content
User Journey
Technical Elements
Need Expert Help Maintaining Your Website?
Ensure your nonprofit platform stays safe, quick, and operational year-round.
Are your calls to action (CTAs) engaging, with action-oriented language such as “Give Now” or “Join the Fight”? Do they tell people what to do and why in the most direct way possible?
Do you have a consistent tone of voice and style? Does all of the content on your site reflect this?
Social and Events
Have you incorporated social media or newsletters to enhance the omnichannel experience?
Do you have a clear editorial calendar and a consistent blog posting schedule?
Are you staying on top of relevant current events and reflecting this in your site’s content?
Is your event calendar easy to find and updated with accurate logistical information? Do events have a ‘save to calendar’ option?
Does every image have accurate and descriptive alternative text?
Are you taking advantage of video content and providing opportunities for supporters to share your videos?
Do your videos have accessibility necessities such as pause buttons and captions?
Are you making use of other media types, such as interactive quizzes or infographics, that drive engagement and increase time spent on the page?
User Journey
Is it clear to a new user why they should want to engage with your nonprofit, from whichever page they enter your site on?
Do your top landing pages have clear user pathways for both macro and micro conversions? For example, macro conversions could include donating, while micro conversions might involve signing up for your email newsletter or following your nonprofit on social media.
Is your bounce rate within industry norms? Nonprofit websites have a 60-70% bounce rate on average (for context, 40% or lower is typically considered a good bounce rate).
Are all of your forms working and formatted correctly?
Are buttons easily clickable from laptops, tablets, and mobile devices?
How is your site performing for SEO? Are you receiving high-quality backlinks from reputable websites?
Your answers to these questions can clue you into whether it might be time to update your website and which areas have the greatest opportunity for enhancement.
Website Maintenance Best Practices for Nonprofits
From assessing growth metrics to ensuring your site complies with new regulations, we’ve rounded up some best practices to follow for effective and sustainable nonprofit site maintenance.
Take a continuous improvement approach
Similarly to taking your car in for maintenance checks to keep it safe to drive and in good condition, your nonprofit website needs regular maintenance to ensure it’s meeting users’ needs and helping you advance your mission.
However, this process entails more than just security updates and updating plugins or modules. We recommend taking a continuous improvement approach to maintaining your nonprofit site, with design and development improvements that allow for growth and flexibility beyond basic fixes.
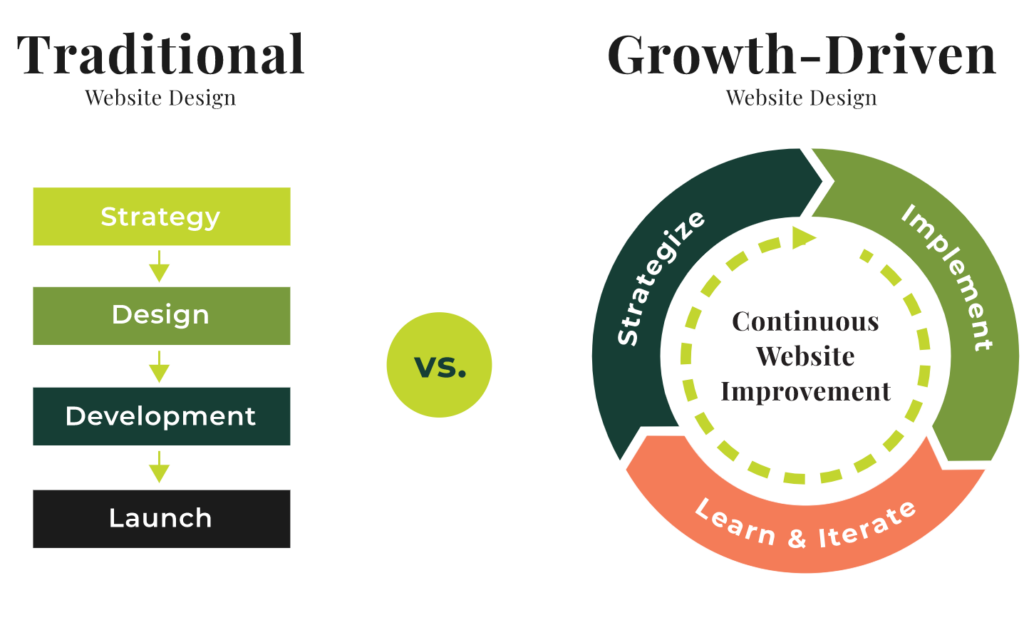
While traditional website design follows a linear approach from strategy to implementation, continuous improvement allows for a circular, iterative process.
This method allows nonprofits to create flexible websites that are constantly tested and optimized over time. With this approach, your organization can continually accept and assess feedback from analytics, heatmaps, and user surveys. Then, you can immediately implement new strategies based on this feedback without having to wait for a major refresh project.
A continuous improvement approach helps avoid enormous update projects that can take months and cost your organization hundreds or thousands of dollars to complete. Instead, you’ll make small improvements over time that keep your site healthy and current, saving you time, money, and major headaches down the line.
Measure growth using KPIs
You can’t celebrate your successes or mark major milestones without having a clear picture of how your site is performing. To stay up to date on your site’s performance, monitor key performance indicator (KPI) metrics such as:
Time on site
Bounce rate
Number of pages visited
New vs. returning users
Traffic sources
You may also want to review data from your CRM to answer the following questions:
Who is donating?
How often are they donating?
Are repeat or “lifetime” donors on the rise or fall?
What are donors’ preferred donation and communication methods?
Assessing CRM data alongside website analytics will help paint a complete picture of who your donors are and how your site is currently meeting their needs. For example, when you know donors’ preferred donation methods (such as credit cards, digital wallets like Venmo or PayPal, or ACH payments) you can make sure to include those payment types on your online giving page.
In addition, if you discover that donors’ preferred communication platforms are social media and email, you can focus your marketing efforts more heavily on those platforms to help drive site traffic.
Keep timely elements updated
Regularly update your event calendar and sync your news and social media feeds to ensure your site remains engaging and relevant. This way, you provide up-to-date information to your users across all of your online channels. Create an editorial calendar to help stay on track, and use automated social media and email marketing tools to schedule your posts in advance.
Regularly update your CMS
Whether you’re using Drupal, WordPress, or another CMS, you’ll need to follow certain steps to keep your site updated, optimized, and secure. If you don’t regularly update your CMS, you could face risks like hacking or loss of functionality.
Kanopi offers services for both Drupal and WordPress updates. Here’s what maintenance looks like on these platforms:
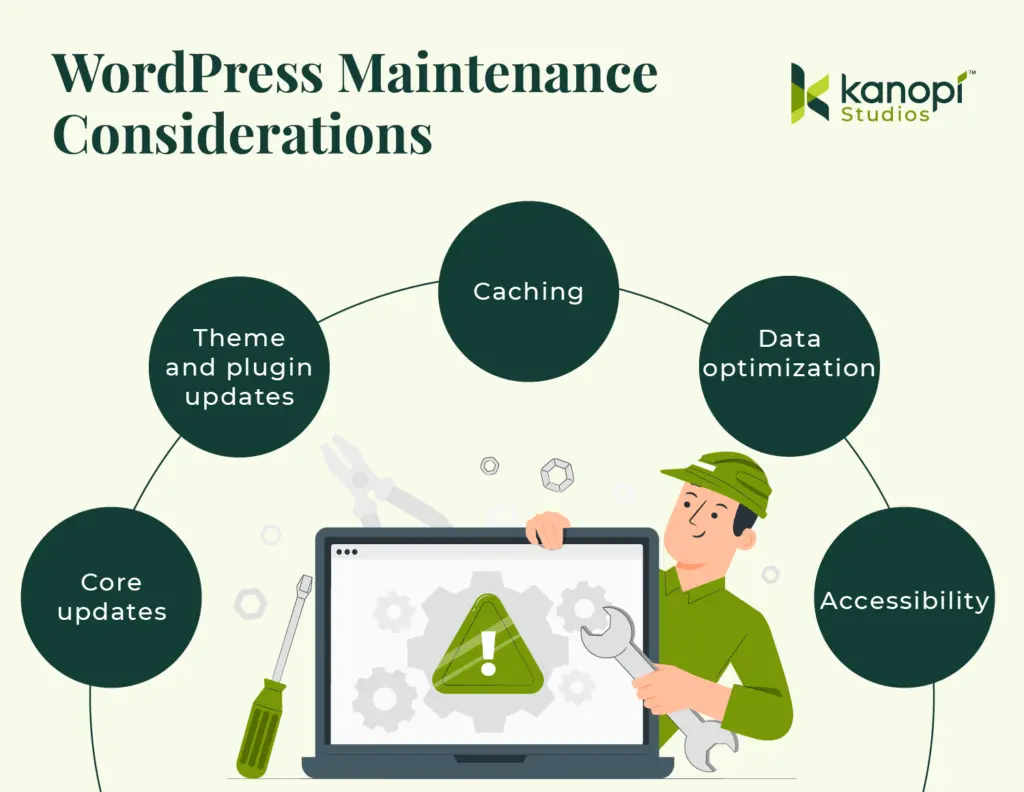
Drupal maintenance involves running Drupal core updates, consistently backing up your site, running module and theme updates, optimizing caching, and fixing bugs.
WordPress maintenance requires backing up your site, updating WordPress core, running theme and plugin updates, and optimizing your website’s database.
Keeping your CMS platform up to date is essential to maintaining supporters’ trust and offering a seamless website experience. Work with a web design professional who can help create a regular schedule for updating your CMS and migrating your site to a new version as needed, like if you need to migrate to Drupal 10.
Stay up to date with relevant laws
Data privacy laws are becoming more and more common as states seek to protect consumers from data misuse. New legislation for states like Texas, Oregon, and Florida is set to take effect this year. In addition, the California Consumer Privacy Act (CCPA), one of the first comprehensive consumer privacy laws in the U.S., has been on the books since 2018.
These laws all have similar provisions, such as:
Consumers must be able to know what data is being collected from them.
Consumers must be able to opt out of data collection.
Businesses must delete data they’ve collected about consumers upon request.
Staying up to date with new legislation can be tricky and time-consuming, so it’s helpful to partner with a trusted web design agency whose business it is to know the latest regulations and law changes affecting nonprofit sites.
Reinforce trust with your audience by offering a clear privacy policy on your nonprofit’s website to let supporters know how you use data and how they can opt out of the collection process. Review examples from top nonprofit websites like the Leukemia and Lymphoma Society or Habitat for Humanity to get an idea of what these policies look like.
Ensure your site is mobile-friendly
57% of nonprofit website traffic comes from mobile devices, making it critical to refresh your site’s mobile version during the maintenance process. Ensure your buttons are large and easy to touch from a phone screen, your mobile site menu is easy to navigate, and your forms are simple to complete from a mobile device.
Continually test website forms
Users should be able to easily complete any forms on your website, whether they’re using a mobile device, tablet, or computer. Test the following forms and buttons on different devices:
Donation page
Volunteer registration form
Quizzes and polls
Feedback surveys
Call to action buttons
Your forms should also be accessible, with sufficient color contrast and descriptive text that appears outside the form fields. We’ll spotlight additional accessibility best practices in the next section.
Keep accessibility best practices in mind
Accessibility best practices constantly evolve as new assistive technologies become available. We recommend using a combination of manual and automated accessibility tests to keep your website updated. Some of our favorite accessibility tools include:
These tools help catch issues related to ARIA attributes, color contrast, headings, and other technical elements. However, we also recommend testing your site manually to catch any issues that testing tools may miss. To ensure you don’t miss anything, work with a web design agency experienced in accessibility best practices to run manual tests.
If you’re looking for an experienced web design partner to keep your website fresh and up-to-date, Kanopi is a great choice. We currently support more than 175+ websites, and around half of those are nonprofit sites.
We offer continuous support through every phase of website development, from research and content strategy to long-term support. Our website maintenance services include:
User persona development and journey mapping to better understand visitors’ goals and how your website can help to achieve them
User testing to ensure new features work and gather feedback from audience members
A full website growth plan customized to your unique needs and goals
Module and plugin updates to keep your site running smoothly
Bug fixes to maintain your website’s security
Conversion optimization to ensure your landing pages are effective for driving deeper audience engagement and donations
Performance enhancement focused on technical elements to maintain fast load speeds and optimal user experience
From researching who uses your site to developing a content strategy that serves both your organizational goals and the needs of your users, our clients value our flexible and nimble approach:
“From the start, we have been very impressed with Kanopi’s creativity… They’ve been flexible and understanding as we hit roadblocks in our internal processes and decision-making. Another key element was how thorough and inclusive they were during our Discovery Process, which led to other departments in our organization feeling connected from day one. Overall, this has been a fantastic experience!”
Anthony Guido, Vice President, Communications & Public Relations, Cohen Veterans Network
For many clients, support means we act as an extension of their team and help them enhance their site. We do this through incremental improvements to strategy, design and UX, key feature development, third-party integration, and more.
First Tee is a nonprofit dedicated to empowering kids and teens through golf programs. Their website is a resource to connect audiences to their services, and it also acts as the host for their regional chapters and member sites.
They came to Kanopi with several problems: their website was growing outdated, and it had originally been created using a restrictive template, which made it challenging to make ongoing updates. In addition, their site lacked cohesion, leading to brand confusion.
We helped by designing a brand-new multi-site solution for First Tee that allows for seamless updates and consistent branding across chapter sites. We also provided ongoing website support to help launch and personalize chapter sites. As a result, First Tee’s website tells a cohesive story, with uniform branding and seamless donation opportunities. Explore the full case study here.
Wrapping Up
To keep your site fresh and engaging and ensure it meets users’ needs, make website maintenance a top priority. Work with your marketing team and a web design consultant as needed to create a plan for continually improving your site so that it stands the test of time.
Want to continue learning about different aspects of website maintenance? Start with these additional free resources from Kanopi:
Using WordPress for Nonprofits: The Ultimate Guide. Running your nonprofit website on WordPress? This guide offers everything you need to know to optimize your WordPress instance and keep your site healthy over the long term.
The ROI of Great Website Design. Refreshing your website design has real quantifiable benefits for your nonprofit’s bottom line. Learn how great web design can have positive ripple effects on your budget.
If you’re researching content management systems (CMS), you’ve probably come across Drupal and WordPress. These CMS platforms are two of the most popular systems that help organizations and individuals build and manage websites easily. But how do you know which platform is right for you?
In this guide, we’ll take a deep dive into the basics of each platform to help simplify your choice. Here’s what we’ll cover:
Ultimately, finding the right CMS depends on your unique needs, web design experience, and budget. This guide cuts through the noise to deliver need-to-know information for these top platforms.
What are WordPress and Drupal?
Drupal and WordPress are both CMS solutions, which allow users to create and maintain robust websites. These platforms separate a website’s front-end content management from the back-end development process, allowing individuals with no coding experience to add new website content and make updates easily.
Drupal and WordPress are often compared to each other since they are both “open-source,” meaning they’re freely available for anyone to download and can be expanded with additional or modified code. Because of their scalability and flexibility, Drupal and WordPress are both viable options for organizations of any size.
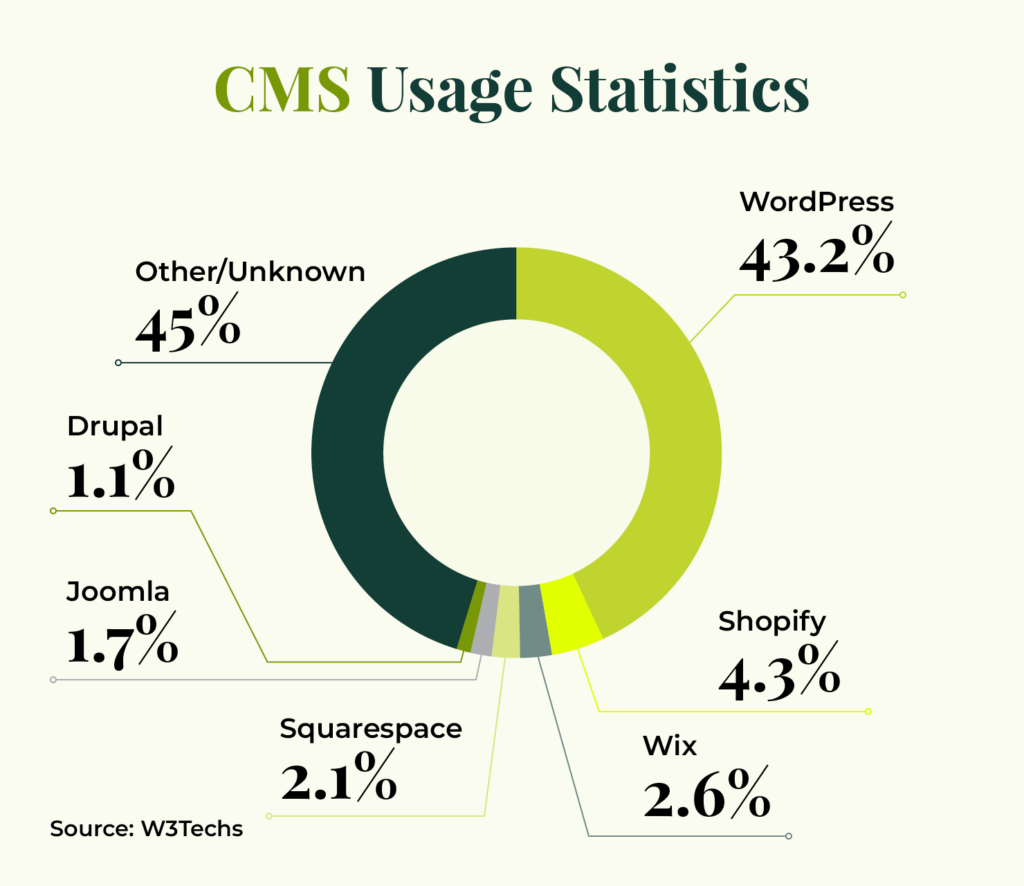
Here are some usage statistics showing how often these platforms are used in comparison to other systems:
WordPress Overview
Currently, WordPress is the world’s most popular CMS. Originally launched in 2003 as a simple blogging platform, WordPress now supports 43.2% of all websites. It’s a free and open-source CMS that many organizations use, like nonprofits and businesses. You can fully customize your WordPress website easily and quickly, with a variety of plugins and themes.
Here are some of the benefits of using WordPress:
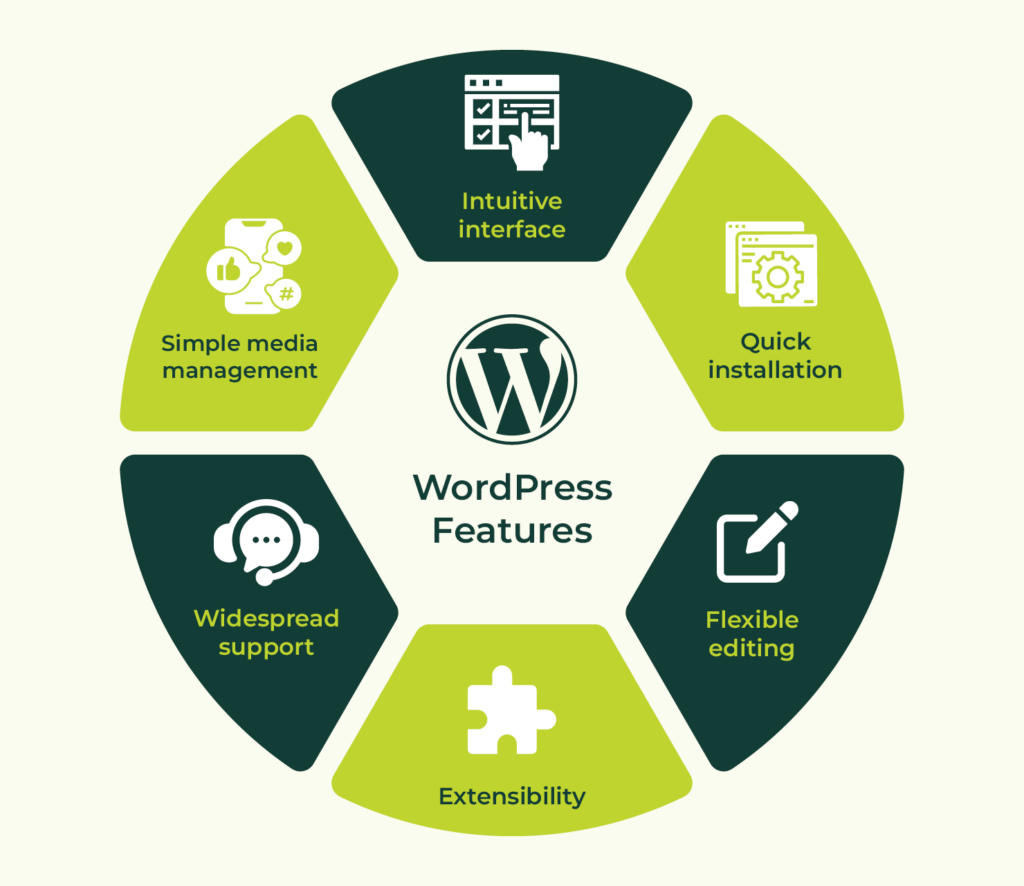
Intuitive and easy to use. WordPress is very user-friendly, especially for non-developers. It features an intuitive user interface and simple media management processes.
Quick installation. It’s possible to develop WordPress sites very quickly to test out new ideas, features, and approaches.
Flexible editing experience. The built-in Gutenberg editor and plugins that add additional types of Gutenberg blocks make it simple to visually create a wide variety of layouts for your content.
Robust extensions. WordPress’ third-party theme and plugin communities make it similarly easy to extend WordPress capabilities without custom development.
Support. WordPress has a massive global community thanks to its open-source network, empowering you to find support for any issue.
SEO optimizations. WordPress offers out-of-the-box SEO features such as optimized URL structures and simple methods to verify your site with search engines. You may also download SEO plugins like Yoast that offer SEO recommendations and redirect management.
Media management. The built-in media manager for WordPress is robust, intuitive, and extensible.
Integrations. If you use specialized systems to manage your email lists and customer relationships, chances are that these integrations already exist and are maintained by the tools themselves for WordPress.
Watch Kanopi’s webinar for more details about how to manage content in WordPress:
Drupal Overview
Currently, Drupal powers 0.9% of all websites and 6% of the top 10,000 websites. Although it’s much less commonly used, Drupal is still a viable option for various websites, including sites for government agencies, universities, and nonprofits.
The latest version, Drupal 11, was launched in August 2024. It offers a flexible framework with both out-of-the-box functionality and the ability to expand upon that platform with advanced features and community-contributed code.
Here are some of the benefits of using Drupal:
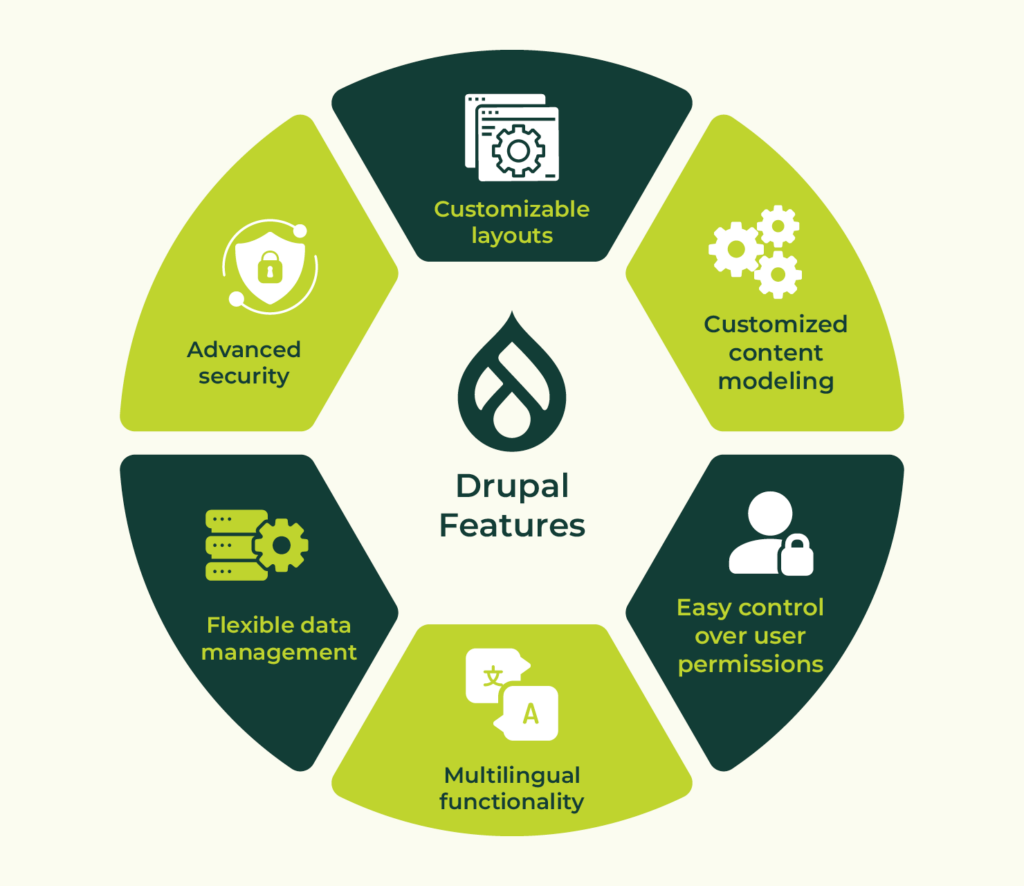
Customized content modeling. Drupal offers the ability to customize content types, fields, and content presentation to meet any content strategy.
Easy control over user permissions. Drupal has a built-in access control system where you can create new visitor and administrator groups with granular permissions for anywhere from a few users to hundreds of thousands.
Multilingual functionality. Starting with Drupal 8, different versions of the same content can be presented in multiple languages out of the box.
Data management. Drupal’s taxonomy system is flexible and ideal for handling lots of content metadata.
Security. Drupal has a dedicated security team that evaluates widely used modules for any vulnerabilities.
Accessibility. Drupal is committed to aligning its back-end editing experience with WCAG 2.0 guidelines as much as possible, making it a great choice for users who need assistive technologies when creating content and maintaining sites.
Inline editing. For simple layouts, Drupal provides the ability to edit content while “looking at” your site. Keep in mind that as content gets more customized and complex, this is more difficult to use.
Customizable layouts. The built-in Drupal system for managing “blocks” of content for sidebars, footers, and other areas allows for detailed control over which pages and contexts in which the content appears. Additionally, it makes it easier to show the same, editable piece of content site-wide.
SEO optimizations. Free community modules extend Drupal’s core offering with human-readable URLs, XML sitemaps, advanced meta tags, and schema.org vocabularies.
Media management. Drupal ships with a robust Media Library for managing images, videos, documents, and audio files.
Integrations. Drupal integrates with a wide range of third-party applications including Google Analytics, Salesforce, and several social media sites.
Let’s compare the features of these platforms side by side for a clearer understanding of their benefits and potential drawbacks.
In general, WordPress provides an easier admin user experience, although Drupal is coming close with its recent version releases. The WordPress interface is simple for even the most casual of users to grasp—there’s no need for a third party to step in. WordPress also has more ready-made themes available from sites like ThemeForest, which helps with cost and timeline barriers. For example, Avada is the #1 best-selling WordPress theme.
If you decide to use WordPress, it’ll likely take less time to find a great theme and set up a fully functioning site than with Drupal. Drupal themes do exist, but many Drupal websites use custom-coded themes or at least one that’s highly customized. This is why many Drupal users end up reaching out to developers to make their sites visually appealing and functional. Drupal has become the clear leader as an enterprise-level CMS platform for more complex projects.
While Drupal may require more technical experience and help than WordPress does, this can show in the end product. Drupal is a great option for companies that have more robust, design-heavy requirements, or a lot of customization.
Security
Whether your website hosts important organizational data or processes your constituents’ financial information, you need ample security and protective steps to ward off data breaches or hackers.
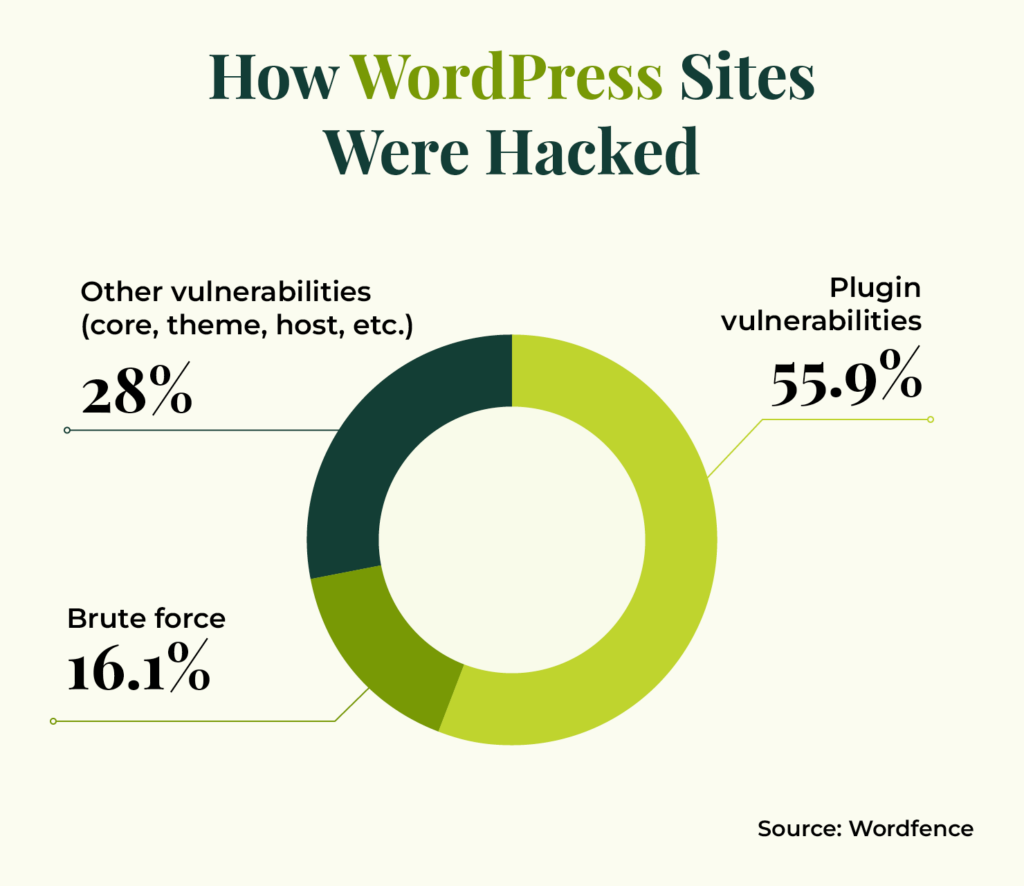
Both core systems have some sort of security measures in place. However, WordPress’ massive third-party plugin ecosystem introduces some risks that aren’t as prevalent in Drupal and its modules. Plugin vulnerabilities account for 55.9% of all known entry points of malicious actors.
As open-source platforms, Drupal and WordPress are free to use. However, platform costs aren’t the only expenses to consider. If you need development or design support, you’ll have to consider the costs of partnering with a platform expert.
In general, there are fewer Drupal developers than WordPress experts, and Drupal experts tend to offer more specialized services. That could make the cost of working with a Drupal partner more expensive.
Another cost to consider is the price of the platform you choose to host your site. Complex Drupal sites may require more costly hosts, while many WordPress hosts are available for just a few dollars a month.
Costs that are common across both platforms include staff training expenses, maintenance and security support, and additional expenses for plugins or modules.
Deployment
Speed to market is another factor to consider when developing a new website. How quickly do you need to get your site up and running? In general, it tends to be faster and easier to develop a WordPress site and push it live, whereas Drupal’s development process may be more involved.
The migration tools you use or the software experts you partner with also play a major role in the timing of the installation process. Carefully vet your support resources to get more information about the timeline you can expect for getting your site live.
Performance
WordPress and Drupal each offer features to improve your site speed and ensure high performance. For example, Drupal offers built-in site caching tools, while WordPress has a variety of plugins that can help manage caching.
However, WordPress’s vast plugin and theme library present some performance risks. Using too many plugins or poorly designed plugins or themes can slow your site down.
On the other hand, Drupal is built to handle the performance needs of complex websites with robust data needs. Drupal’s built-in optimization features and enterprise-level capabilities support faster load speeds for large websites.
Customization
Thanks to their open-source code, both Drupal and WordPress have ample opportunities for you to expand and customize your CMS to your organization’s needs:
While WordPress is famous for its clean, consistent administrative interface, Drupal allows you to apply different administrative themes to your website or even use your public-facing theme as part of your site management and editing experience.
Support
If you’re looking for support or advice to manage your website, you’ll find plenty of resources available for both Drupal and WordPress. Since WordPress is much more commonly used, there are plenty of developers and resources available if you need help, such as online tutorials and guides. Drupal also offers forums, robust community documentation, and training support.
SEO Capabilities
Both WordPress and Drupal offer SEO features and extensions that can be integrated into the platforms to help with good search engine ranking. For example, Drupal’s PathAuto module is a great place to start—this module automatically creates user-friendly URLs for your content. In addition, WordPress’s Yoast plugin offers technical SEO suggestions, advanced XML sitemaps, and readability analysis.
Which is better: WordPress or Drupal?
Realistically, there is no best overall CMS, but it is worth it to explore the differences to consider which solution is right for your unique situation and needs.
Taking in the facts above, WordPress is a great solution with its wide range of plugins and extendability options. It’s easy to use, can be set up quickly, and offers a robust community of developers if you ever have questions or concerns.
However, if you are building a more complex site that will facilitate lots of important data or sensitive information, Drupal is a better choice for its high-security features. You can still expand and customize your system, but it might take a little longer.
Partnering with WordPress and Drupal Experts
Regardless of which option you choose, consider partnering with a dedicated website service agency, like Kanopi. Kanopi knows that all organizations and websites are different—they come with their own needs and have different goals. We can aid your journey by learning about your mission and developing the best website for your organization.
On top of helping you figure out the best CMS for your needs, the Kanopi team can:
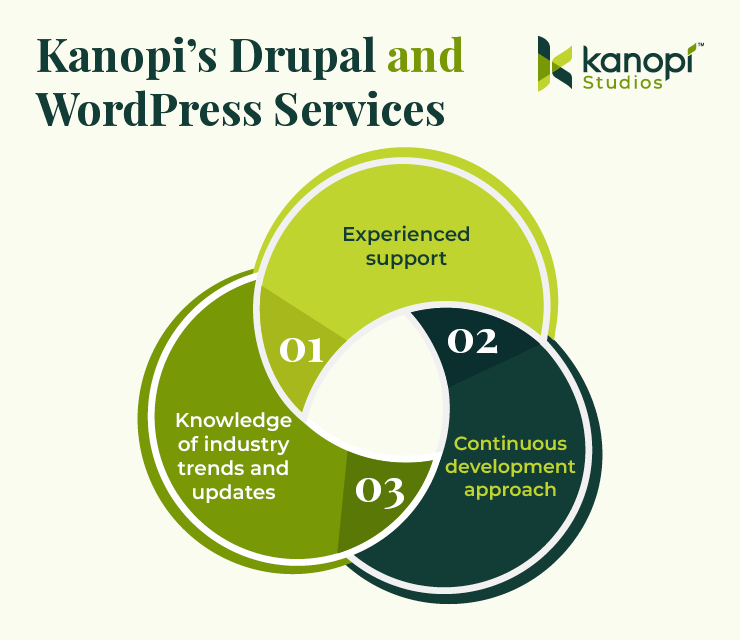
Offer experienced support. Working with an experienced developer is essential to give your site the foundation it needs to succeed. Kanopi’s team offers a wealth of experience in both Drupal and WordPress. Each of our Drupal team members has an average of 11 years of Drupal development experience and our WordPress developers regularly speak at WordCamp conferences throughout North America.
Promote a continuous improvement approach. Through this approach, we’ll ensure that your website is always up to date, working properly, and set up for long-term growth. This includes module/plugin upgrades, bug fixes, security patches, third-party integrations, and more.
Stay updated on industry trends, standards, and updates. Regardless of whether you choose WordPress or Drupal, our developers stay up to date with CMS trends by attending conferences and making regular contributions to both communities to help extend and maintain the systems.
For examples of our work, explore our past Drupal and WordPress projects. We work with clients across multiple industries, including healthcare organizations, universities, government organizations, businesses, and nonprofits. We can manage your Drupal or WordPress project at any stage, from migrations to full builds and support.
Interested in partnering with Kanopi? It doesn’t matter what CMS you use—we would love to hear from you and get started with a customized plan to make your website the best it can be.
Additional Resources
Continue learning about Drupal and WordPress with the help of these additional resources:
The Donor Journey: Creating Smarter Digital Experiences
Allison Manley
We’ve all heard the phrase: “Life is a journey, not a destination.”
Similar to the choices in our everyday lives, the decisions your donors make can impact how and if they decide to give to your organization. This is known as the donor journey.
Regardless of whether you’re a long term fundraising professional or you’ve just established your organization, “donor journey” shouldn’t be an unfamiliar term. It’s pretty self-explanatory—it describes how a potential prospect makes their way to becoming an official donor and an advocate for your mission. It includes everything from conducting research on your nonprofit’s website to promising continued support.
Understanding and refining your donors’ experiences enables greater mission outcomes. We’re here to tell you exactly what the donor journey entails and how you can create the most enjoyable experience possible for your supporters.
The donor journey is a framework that fundraising professionals in nonprofits, higher education institutions, and other organizations use to better understand and engage with their supporters. It encompasses each stage of a donor’s relationship with your organization, from their first interaction to their continued support.
By mapping the donor journey, you can better track how and when your supporters engage with your organization, allowing you to uncover opportunities to strengthen those relationships.
Remember, your donors are one of your organization’s most important assets. They provide you with the essential funding needed to continue your meaningful work and serve your community. It makes sense that you do everything you can to recruit and retain them, and that starts with understanding their journey with your nonprofit.
Why Is Donor Journey Mapping Important?
Understanding the donor journey will not only help you track how and when your supporters give, but it’ll also provide some basis for why they donate. The more familiar you are with your average donor’s journey, the better you can engage with them and garner more support down the line.
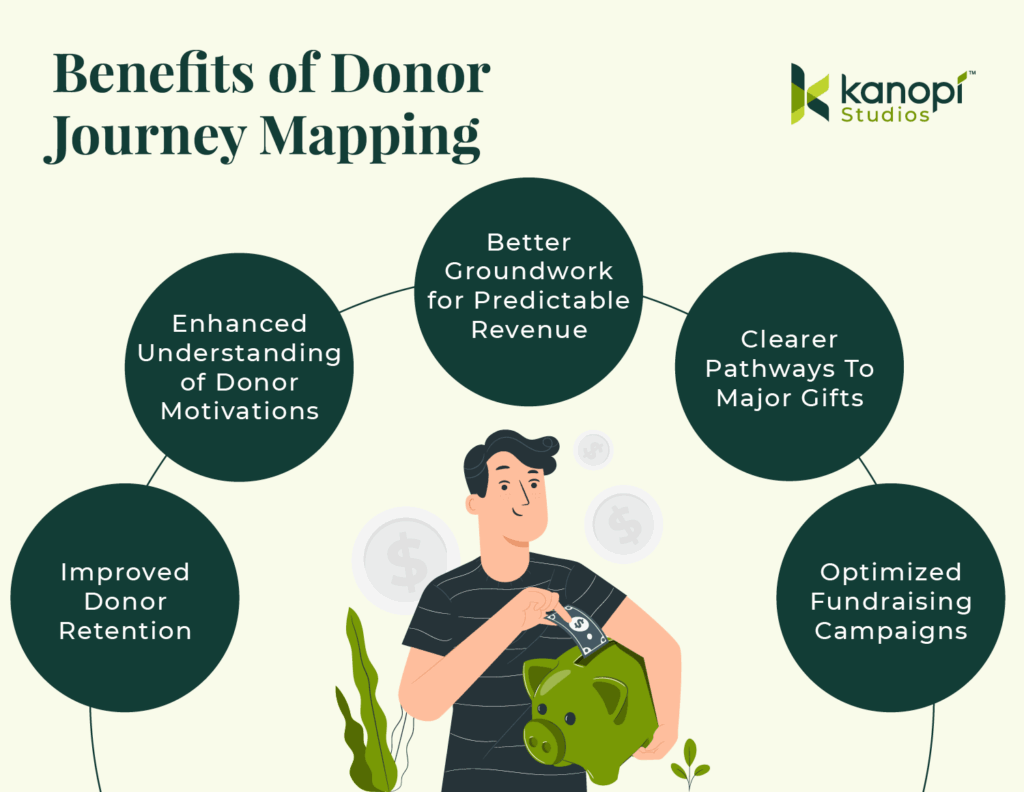
Some of the key benefits of mapping the donor journey include:
Improved Donor Retention: Mapping out the donor journey helps identify key touchpoints where donors may lose interest or disengage, allowing you to address these issues and improve retention.
Enhanced Understanding of Donor Motivations: Mapping out the donor journey tells you what motivates your donors to give, helping you adjust your outreach to align with their motivations and values.
Better Groundwork for Predictable Revenue: By understanding the typical pathways supporters take, your nonprofit can anticipate giving and forecast revenue streams more accurately.
Clearer Pathways to Major Gifts: Donor journey mapping can pinpoint engagement patterns and touchpoints that often lead to larger gifts over time.
Optimized Fundraising Campaigns: You can identify what marketing messages and campaigns resonate most with donors, allowing you to pick the best types of campaigns and craft meaningful appeals.
Whether you leverage this strategy for its fundraising benefits or impact on your reputation, donor journey mapping is an essential part of your nonprofit digital strategy.
The Elements of the Donor Journey
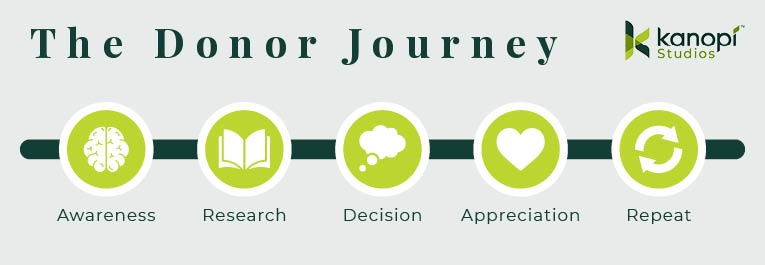
What makes up the donor journey? Each stage may differ slightly depending on your organization and your supporters, but the donor journey will likely follow these elements regardless of your unique situation: Awareness, research, decision, appreciation, and repetition.
Donor Journey Step 1: Awareness
This is the very first step of the donor journey. Whether it’s through your website, a post from a friend on social media, or word of mouth, this is the moment that the prospect becomes aware of your organization and mission.
Without awareness, the donor journey never begins. To raise awareness and increase the likelihood of new supporters, follow these tips:
Optimize your nonprofit website for SEO to improve your presence on search engines.
Create supporter personas to better understand the type of audiences that engage with your organization.
Actively use your social media channels to give updates on your mission.
Update your website with recent accomplishments and major changes.
Keep your content human-centric to appeal to new supporters.
Get involved in local events, fairs, or speaking opportunities.
Collaborate with influencers, companies, or other nonprofits that align with your mission and have influence within your target audience.
Encourage existing supporters to fundraise on your behalf, leveraging their personal networks to spread awareness.
Consider paid advertising to promote your mission and tap into advanced targeting features, like how the World Wildlife Fund uses Google Ads to target mission-related terms:
Donor Journey Step 2: Research
Once someone is aware of the need for your mission, they’ll likely do further research to determine whether they want to support the cause and how they can do so.
This entire stage is about building trust. You need to give potential donors a reason to give to your organization and support your efforts.
First off, ensure your nonprofit website is optimized. This is likely the first place a prospect is going to look when researching your cause. Your website should be regularly maintained and updated to promote valuable content about your mission and organization. You can:
Use success stories and infographics to relay accomplishments and important metrics quickly.
Provide concrete metrics and data to back up your claims.
Practice transparency by being honest about where your funds go and by being open to answering questions.
Compile and share an annual report that summarizes your yearly accomplishments and progress.
Include testimonials from other donors or from specific community members you help.
Post compelling content like news stories and blog posts related to your mission online (content marketing costs 62% less than traditional marketing strategies, making this both a cost-effective and engaging strategy).
While you should always prioritize transparency, try to focus on the value you bring to the community and avoid being overly pessimistic. Too much negativity can make users less likely to donate.
Donor Journey Step 3: Decision
Now that your prospect is familiar with your organization’s work, they’ll show their intent in some way. This can be opting into email newsletters or following your social media accounts. They might even decide to make their first gift.
To encourage prospects to take the leap and donate, consider the following:
Ensure the target action is prominently displayed in all marketing content, including social media and email. Incorporate CTAs like large buttons and easy-to-find links that send prospects to your donation form.
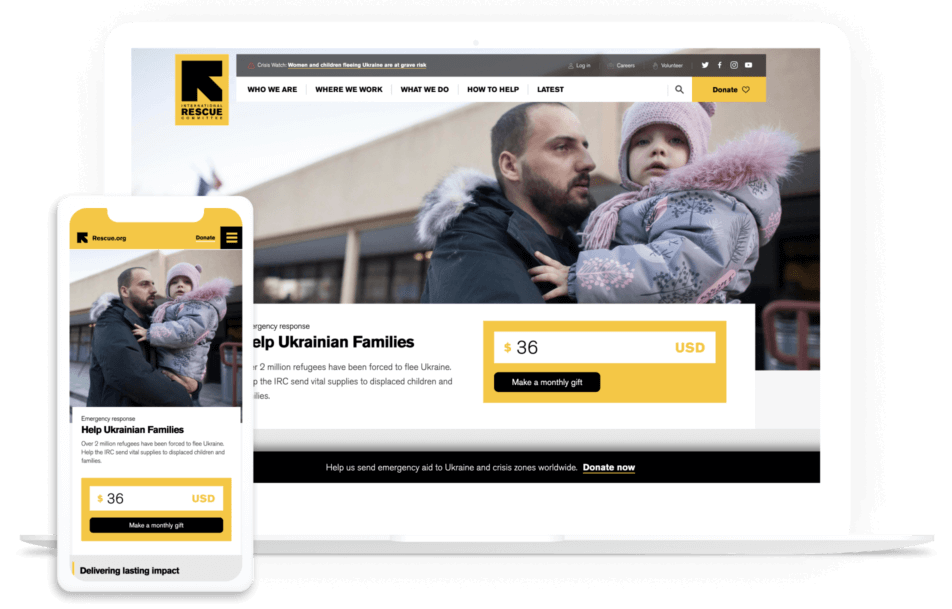
Make recurring donations a primary option. Within your donation form, add a simple box that supporters can check off if they want to give regularly. Alternatively, create an inspiring monthly giving page like the International Rescue Committee did. Either way, making recurring donations a primary option encourages your donors to become consistent givers:
Show the value of suggested donation amounts. Sometimes it can be hard to contextualize how a gift will help an organization. List a couple of suggested amounts as well as the direct impact they have. For example, tell supporters that a $100 gift will pay for 10 meals at your community homeless shelter.
Design your website with an accessible user experience (UX) in mind. Ensure that your nonprofit website is accessible to everyone, regardless of their location, language, ability, or device. This enhances the user experience and expands your supporter base. Learn more about this topic with our article on demystifying website accessibility compliance.
Feature matching gifts across your site. Donors often need a nudge, and matching gift research shows that 84% of donors are more likely to donate if they know that their employer will match their donation. Add a corporate giving page to your navigation menu and embed an employer search tool into your donation page to highlight this opportunity at a key point in the donor journey.
Donor Journey Step 4: Appreciation
Once the gift is made, this doesn’t mean the journey is over. In fact, this is the perfect opportunity to set the foundation for future engagement with a thank you letter and a summary of impact.
Showing donor appreciation is an integral part of the donor journey. Your supporters need to know how much their contribution has impacted your mission. Many donors stop giving because they simply don’t know what their previous gift did. Even so, more than 60% of nonprofits don’t thank donors properly.
Here’s what you can do to thank donors in ways that resonate:
Use your email solution to automate thank you messages to send as soon as a gift is made.
Take advantage of data automation to personalize each message with name and gift size.
If known, describe the specific impact the gift has made.
Include a “next step” in your letter, such as signing up for newsletters, reading a success story, or checking their matching gift eligibility to take their support further.
Follow up once the campaign is complete, and use data metrics to report on their gift’s full impact.
Add an option for donors to share their contributions on social media, further spreading awareness of your mission.
Create a thank-you video that features heartfelt messages of appreciation from staff or beneficiaries.
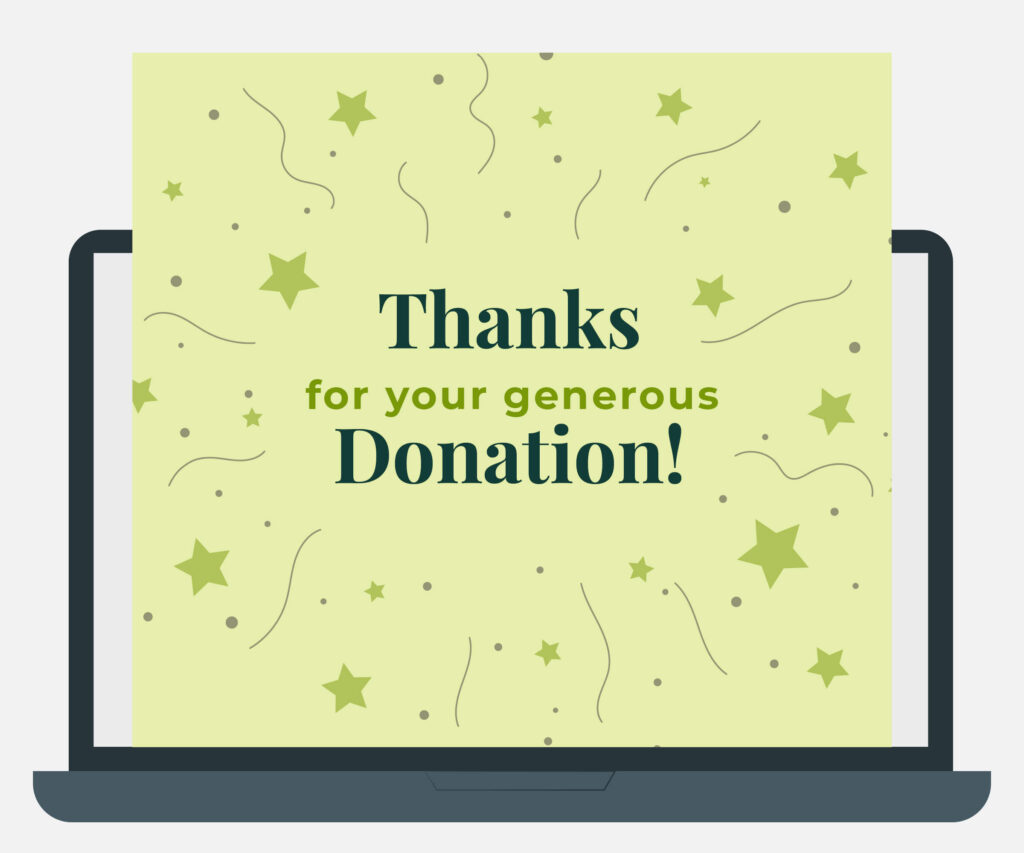
Use engaging formats for thank-yous, such as a digital greeting card with a mission-related illustration or a compelling image of a beneficiary, to demonstrate genuine gratitude:
Donor Journey Step 5: Repeatable
Ultimately, the final goal of recruiting new donors isn’t the gift itself. It’s the meaningful relationship you cultivate and its foundation for long-term support.
With the donor journey, you’ll be repeating the same cycle over and over again. However, that doesn’t mean you have to overhaul your website or marketing materials—but it is a good idea to review them to ensure they are fully up-to-date.
To keep donors on this journey, you’ll have to continue inspiring them with valuable messaging, update your website with the most recent accomplishments, and continue to build these important relationships. This is vital since a 10% reduction in donor attrition can yield up to a 200% increase in projected value. In other words, the higher your donor retention rate, the better!
Remember, your relationship should be built on open communication, not a marketing initiative. Welcome feedback, share successes, alert people to upcoming events, and show appreciation at each stage.
How to Map Donor Journeys for Your Nonprofit
The donor journey for your nonprofit will follow the basic elements above. But understanding the specifics requires some careful planning:
Define your key performance indicators (KPIs).
Make sure you’re tracking organizational success beyond fundraising dollars. Website visits, email opens, and more can all be helpful KPIs to track. Also, review benchmark data to see how similar organizations measure success and how your nonprofit compares.
Create audience personas.
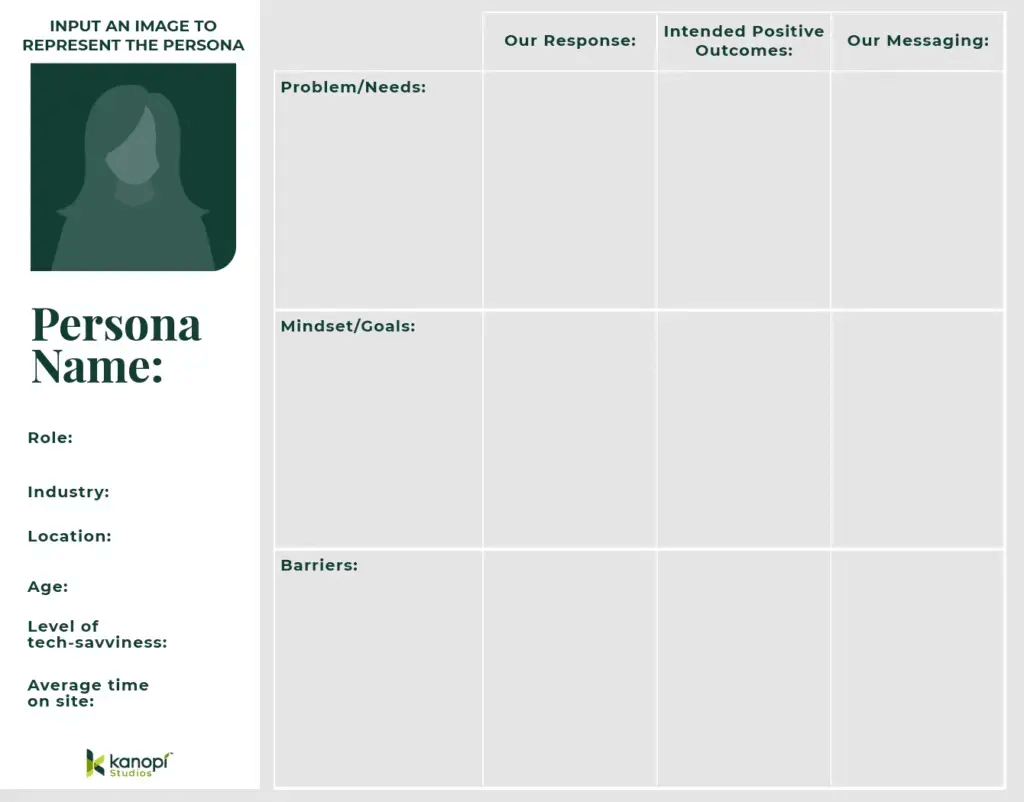
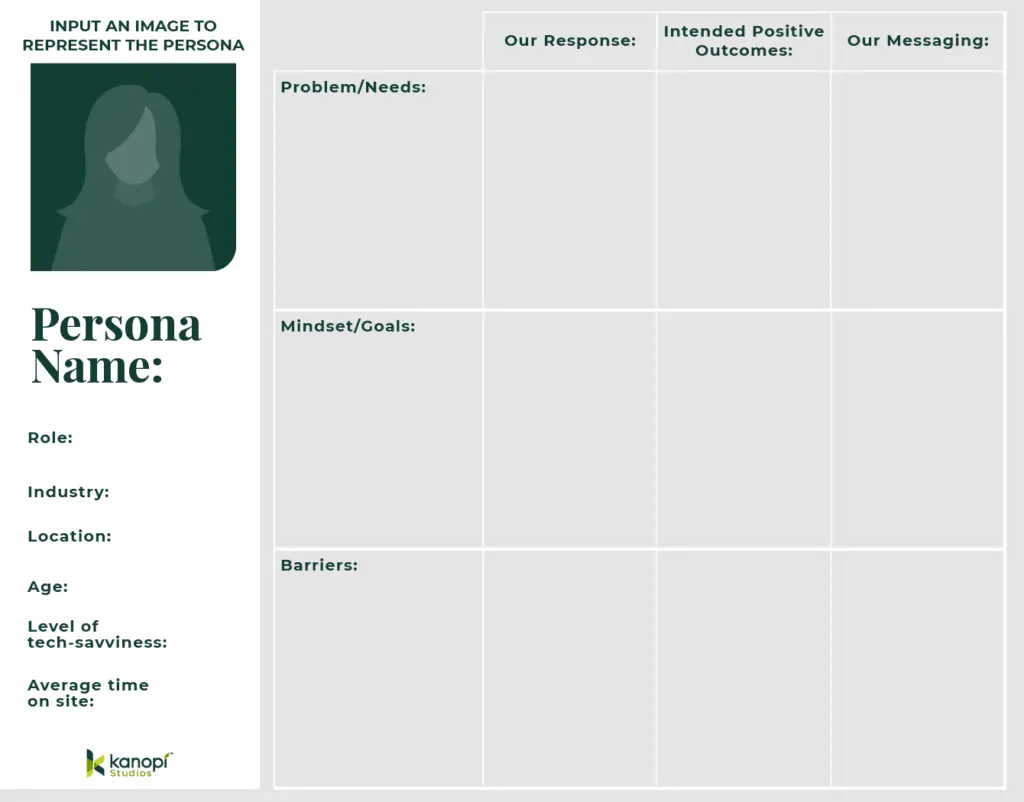
Many marketing leaders use audience personas to understand their supporters and create targeted outreach strategies. Think of a persona as your hypothetical ideal supporter. Each persona should include demographics, personality traits, interests, goals of supporting your work, and barriers your organization can help them overcome.
Also, consider how they engage with your organization. Do they often check out your website for new updates? Do you interact with them on social media? Use this persona template below to help get started:
Isolate aspects of your digital user journeys that apply to the donor journey.
In an increasingly digital world, people primarily find out about your mission online. Make sure their digital journey on your website and across your online marketing channels guides their decision to give.
By understanding your nonprofit’s digital touchpoints, you can ensure a seamless experience and adapt to the fast-paced digital landscape. If you notice areas in which your technology doesn’t meet expectations, you might need a tech upgrade. That might mean purchasing new donation software, investing in a more robust CRM system, or enhancing your website’s functionality to better support user engagement.
Review the elements of an effective donor journey.
This enables you to note any improvement opportunities. Do you need more educational content on your website to support the research stage? Do you have a lot of supporter engagement but insufficient gifts? There may be a problem in the “decision” stage of your donor journey. Noting these elements will clue you into the touchpoints you need to work on.
You can also look for trends and metrics in your nonprofit database to find where donors fall off. This can indicate what improvements to make to your recruitment and retention strategies. For instance, you might notice your online donation form’s conversion rate or website’s bounce rate is low, signifying that you need to improve those pages to better support the research and decision stages.
Revisit, refine, and retest often!
Don’t stop after you outline your donor journey. Instead, continue reviewing how your supporters engage with your offerings and donate. Whether it’s due to new technology or the economic climate, the donor journey will change over time.
Pro Tip: To accurately flesh out the donor journey and apply its insights to your own organization, turn to a nonprofit technology consultant like Kanopi. By working closely with a professional, you’ll gain a better sense of not only how your supporters engage with your organization but also how you can use those findings to improve outreach and retention.
How Kanopi Can Help
At Kanopi, our expert web developers and designers are top partners for nonprofits. We’ve helped to develop over 150 active sites and launch their digital transformation.
Our continuous improvement team works closely with your organization to become familiar with your goals and supporter base. With thorough research and insights into the larger nonprofit and web industry, Kanopi can help you map out a donor journey and:
Create user personas to determine your nonprofit audience and come up with an outreach strategy that best targets their needs.
Design your website with the donor journey in mind to ensure it funnels prospects to your online donation page and is SEO-optimized.
Analyze your content strategy to enhance donors’ experiences when researching your cause.
Offer insight into the best ways your website can aid your donor journey.
Ensure your website follows accessibility and compliance guidelines.
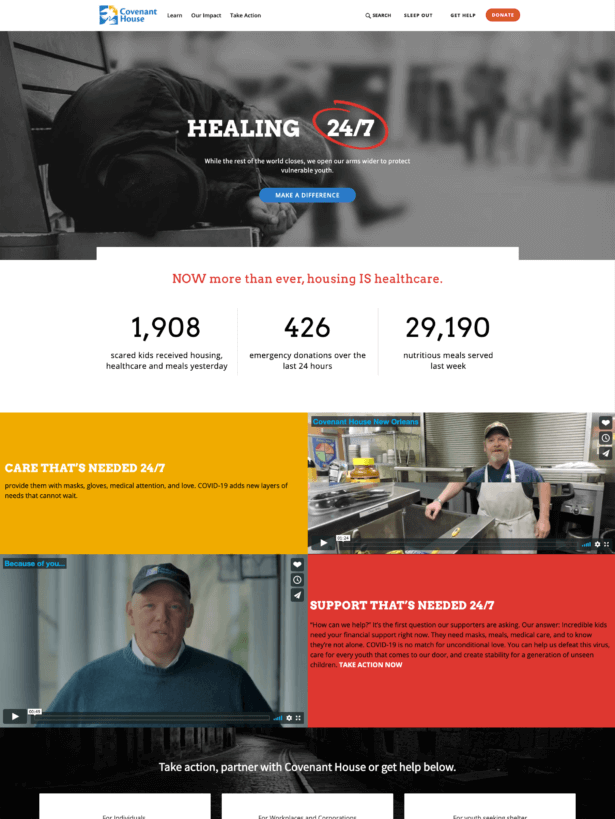
For an example of our work in action, check out our project for Covenant House. As part of our work, we updated their donation processes, improved donor tracking, and created a detailed roadmap to guide their digital transformation. They experienced a 42% increase in transactions, 178% increase in new users, and 123% increase in sessions per user—just to name a few of the site’s notable improvements.
Partner with us to start leveraging the donor journey for your own organization. We can help ensure your nonprofit marketing methods and website meet your needs and help you with your goals. Contact us here to learn more.
Wrapping Up
Mapping the donor journey empowers your nonprofit to refine every step of the giving experience. Knowing where supporters fall off allows you to proactively improve those steps and inspire supporters to stick around long-term.
With so many donors giving online, improving your organization’s donor journey all starts with a strong website. Make it easy to learn about your cause, find involvement opportunities, and ultimately donate. Remember, our team can step in to improve your website, whether you need technical assistance, design help, or a complete relaunch.
As you touch up your website, check out these helpful resources:
Using WordPress for Nonprofits: The Ultimate Guide. WordPress is one of the most popular website builders available. Learn how to leverage the platform to drive donations, educate your audience, and enhance your digital presence.
Higher Ed Website Design: 12+ Trends and Tips for 2024. Higher education institutions need powerful websites to engage alumni, attract prospective students, and keep parents informed. This guide teaches powerful web design tips you won’t want to overlook.
Don’t look now… but 2024 is already lurking around the corner. Among other more festive things, this means it’s once again time to peer into the near future and see what the upcoming year may bring to the world of web development. There are so many cool things going on in the “dev” world these days that it’s hard to encapsulate it all into the kind of singular, broad summary that initiates many of these posts.
If there is a connecting string, it’s that more parts of the user experience are becoming automated than ever before. Providing greater control over the editing experience not only saves creators time, but also allows both creators and developers to focus on key issues like accessibility, performance, and security.
Here are a few specific development trends to look out for in 2024:
More machine learning and web personalization
Machine learning will continue to gain traction in the personalized web space, thanks to its ability to analyze massive volumes of data on user behaviors and surface recommendations and experiences that suit users best.
More AI
With the buzz around artificial intelligence in 2023, we’ll likely see more use cases and integration with the web. AI models and systems will continue to be woven into personalization and the content editing experience.
For example, the ChatBot ChatGPT for WordPress plugin can build a complex understanding of your site content to engage with end users, providing relevant responses that are specific to your content, and the user experience.
(One note here: the key word here is ‘relevant’, by which I’m referring to technical relevance. For a discussion about AI’s capabilities compared to human writing, check our companion post: Top trends in content and design for 2024.)
On the Drupal front, projects like the ChatGPT and the OpenAI modules provide in-site help to editors for content generation, translation, assistance for SEO, and image generation.
More modular layouts
The rise of drag-and-drop editing in web development will continue to make life easier for editors.
Tools like WordPress Block Editor (a.k.a. Gutenberg blocks) and block patterns (a collection of blocks) continue to become more editor-friendly.
Content editing will continue becoming modular thanks to predefined blocks, blocks built for their site, and reusable blocks.
Drupal has put the power of flexibility into the editor’s hands with Drupal Paragraphs, Layout builder, and a suite of additional modules and hooks that allow developers to create a drag-and-drop editing experience.
More security — and continued privacy concerns
2024 will finally see Google officially move to block all third-party cookies within the Chrome browser. Stronger data protection measures like Google’s will inevitably lead to more enhanced, conscious cookie mechanisms and management.
Overall, we’ll see the web itself continue to adapt to become compliant with evolving data protection regulations, such as adhering to personal identity information (PII) policies. This includes publicly accountable organizations like educational institutions and government agencies (and their private contractors and suppliers) taking more steps to ensure their data remains in the country.
More mobile devices and better overall performance
Did you know that more people these days have access to a mobile phone than a computer? It’s true — and this number continues to grow. As more users in low-bandwidth areas require access to information, making sites fast and efficient across devices is more critical than ever. Mobile-first design will keep growing in 2024, as will content-first design and development — i.e. prioritizing meaningful content over flash and glitter.
More accessibility
In 2024, accessibility requirements across industries will continue to be in the spotlight. More industries than ever are realizing that being accessible to all audiences is incredibly important. For example, meeting your industry’s accessibility’s compliance levels and having clear on-site policies can mitigate potential liability.
Did you know that Shane is our very first Kanopi employee, ever? If you’ve enjoyed reading his post, please check out his other great works in our blogosphere, such as: Four Simple Steps to Migrate from Drupal to WordPress
Interested in using WordPress to build your nonprofit website? You’d be in good company—60% of nonprofits globally use WordPress as their website’s content management system (CMS). Plus, some of the best nonprofit websites are built using WordPress.
WordPress can help your nonprofit create the engaging website it needs to connect with community members and supporters, raise mission awareness, and drive funding.
This guide will help determine whether WordPress is the right choice for your nonprofit and how to implement an effective WordPress strategy. Here’s what we’ll cover:
Let’s begin by exploring some of the advantages of WordPress and other CMS platforms.
Is WordPress for Nonprofits the Right Choice for Your Organization?
When choosing a content management system for your nonprofit, you might be deciding between several top platforms, such as Drupal and WordPress. How can you determine which option is best for your nonprofit? It’s essential to select a CMS that will support your long-term goals, so consider the following WordPress pros and cons before deciding.
Reasons to Use WordPress
Reasons to Use Drupal
User-friendly interface
Equipped to handle complex content needs
Simple editorial process and media management
Allows for more customization
More cost-effective to maintain
Offers a variety of user roles
Cheaper/easier to find talent to help with maintenance
Readily-available educational resources
Reasons to Use WordPress for Your Nonprofit Website
Many marketers and web professionals find themselves drawn to creating a new website using WordPress or switching to WordPress because of the following benefits it offers:
User-friendly interface. WordPress is renowned for its user-friendly backend that makes it easy for beginners to upload content.
Simple editorial process and media management. WordPress leverages the Gutenberg block editor, a user-friendly, flexible drag-and-drop site builder. Plus, the Media Library makes storing videos, images, and other content assets simple.
More cost-effective to maintain. WordPress is free to use, and many hosting providers offer free or affordable options for smaller nonprofits with limited budgets.
Cheaper and easier to find talent to maintain your website. It’s also easier to find developers to support your WordPress strategy ataffordable rates.
Easy to find educational resources. If you take a more DIY approach, it’s very easy to find development resources online because of the vast size of the WordPress community.
WordPress has broken away from past misconceptions that it’s merely a blogging platform and not meant to be used for large organizations with complex needs. Quite the contrary, WordPress is used by a wide variety of organizations, from nonprofits and universities to large corporations and government agencies.
Reasons to Use a Different CMS for Your Nonprofit Website
Despite the many benefits WordPress can offer your nonprofit, there are still a few reasons why you might lean toward another platform, like Drupal.
Nonprofits might use Drupal instead of WordPress if they:
Have complex content needs. Drupal’s Taxonomy module makes it easy to classify and organize web content, simplifying functionality for organizations with more complex data needs.
Need more customizability. Drupal’s content types and customizability are often considered the most flexible options on the market.
Want to create a variety of user roles. Drupal allows users to develop a wide variety of roles with different access levels and permissions, whereas WordPress only offers six pre-defined roles.
Of course, there are other CMS options besides WordPress and Drupal, including HubSpot, Squarespace, and Wix. However, WordPress and Drupal are the most popular options for nonprofits and are generally considered the most useful for building a strong online presence.
Still conflicted on which CMS is right for your organization? Take this quick quiz to help determine the right solution for your needs:
Find Your Ideal Nonprofit CMS
Take this quick 6-question quiz to determine whether WordPress or Drupal fits your organization’s resources, workflows, and development budget better.
Question 1 of 6
Your Assessment Results
Ready to build a nonprofit website that takes your mission to new heights?
Planning Your Nonprofit WordPress Website
After reviewing the advantages of WordPress vs. other CMS options, you might determine that WordPress truly is the right choice for your nonprofit. Next, your nonprofit should follow these steps to set up a powerful website that supports your mission:
Set goals
Any successful project starts with setting clear goals for your team. What do you hope to get out of your brand-new WordPress website? How will it support your ultimate goal to work toward your mission and create positive change in your community? Identify objectives and relevant key performance indicators (KPIs) such as:
Goals
KPIsto Track
Increase website traffic
Total number of visitors, bounce rate, click-through rates from sources like organic search and email
Spread mission awareness
New donor acquisition rate, unique users, geographic location of users, donor demographics, volunteer acquisition rate
Increase online donations
Online donation page conversion rate, online donor retention rate, average gift size
Website traffic goals: How many website visitors do we hope to have in our first six months? Or in our first year?
KPIs to track: total number of visitors, bounce rate, click-through rate from sources like organic search and email
Mission-related goals: How many new donors, volunteers, or ambassadors can we recruit through our website? How can we use our website to spread awareness of our mission to new geographic areas or new demographics?
KPIs to track: new donor acquisition rate, unique users, geographic location of users, donor demographics, volunteer acquisition rate
Online fundraising goals: How many online donations do we hope to facilitate through our website in the first year?
KPIs to track: online donation page conversion rate, online donor retention rate, average gift size
Research your audience
Conduct audience research to learn more about the individuals you’re aiming to reach online. Start by building user personas. User personas are fictionalized representations of different audience segments. They include information like:
Demographic information about each group, such as their age, location, occupation, and level of tech-savviness
The user’s problem or what they need from your website
The user’s end goal or purpose for using your website
Possible barriers they may face and common concerns they have
Here’s a template you can use to design user personas for your website:
Develop three to five personas for your primary audiences. Then, consider how you can design your website to appeal to the needs and motivations of each group. How will you use navigation, calls to action (CTAs), and messaging to meet each user’s needs? We’ll dive more deeply into optimizing the user experience and navigation in later sections.
Choose a domain name
Your domain name is the URL users will type in or click on to access your website. For example, if your nonprofit is called Ocean Guardians Alliance, your domain name could be oceanguardiansalliance.org.
Most nonprofits typically use the extension .org (short for organization), whereas .com is typically used by businesses and corporations.
When choosing a domain, consider pricing—a domain name is usually $10-$20 per year. You’ll also need to renew ownership of the domain name periodically. Domain names typically have a renewal period of a minimum of one year and a maximum of 10 years. Browse domain name registrars to find the right option for your organization.
Choose a host
A website host allows you to purchase space to house your website on the internet. Your host provides a server to hold your website’s files and make them accessible to everyone. Popular, trusted hosting platforms for nonprofits include:
Pantheon: Offers fast performance speeds, streamlined workflows, and advanced security.
WP Engine: WordPress-specific website host with proprietary WordPress caching, automated updates for plugins, themes, WordPress core, and PHP, and 24/7 support services.
Kinsta: Offers real-time chat support, high performance, and reduced load times with Edge Caching.
When choosing a website host, consider pricing, your website needs, and customer support services. Evaluate each platform’s features, such as bandwidth, security features, domain registration, disk space, and e-commerce functionality. Some hosts offer discounts for nonprofits, so look into available perks as you make your decision.
Select a theme
A WordPress theme is a set of pre-made templates and code files that work together to build a website’s front-end styling. When building your WordPress website, you can either select a pre-made theme or work with a WordPress developer to create a custom theme. We’ll explore the pros and cons of both options in a later section.
Design the user experience
The user experience (UX) is the way visitors interact with your website. It involves the links they click, pages they read, forms they fill out, and other ways they engage with your content.
Positive nonprofit user experience fosters stronger relationships with your online audience and greater engagement with your mission. Design a powerful UX by:
Implementing helpful CTAs. CTAs help visitors navigate your website by quickly finding pages and resources that they’re looking for. Create CTA buttons and links for your most important pages, like your online donation form or volunteer registration page. Make your CTAs prominent and eye-catching, with bright colors and bold fonts, to drive more engagement with your target actions.
Developing user journeys for each of your web audiences. The user journey involves specific steps audience members take based on their needs and motivations. Design user pathways for your primary audiences, such as donors, volunteers, corporate sponsors, and those looking for support from your nonprofit. Use specific CTAs that call out different audiences by name to make it easier for visitors to navigate. For example, check out how the Boys & Girls Clubs of America website leverages an “I am” CTA to let visitors choose the category that best fits their needs:
Prioritizing accessibility. Accessibility means all visitors can understand and use your website regardless of any temporary or permanent disabilities they may have. Better accessibility means a positive user experience for all visitors. Follow the Web Content Accessibility Guidelines (WCAG), which include specific steps to take to improve your site’s accessibility. A few recommendations to implement are using strong color contrast, including alternative text for images, and ensuring your website is keyboard-navigable.
Wireframes are blueprints for key landing page layouts. Wireframes help visualize a website’s structure and ensure the user experience is optimized before inputting content.
Your wireframes should include space for images, page headlines, CTAs, and your main menu. Create wireframes for high-impact pages like your homepage, online donation page, blog, and event calendar.
Develop navigation
Navigation is the way visitors move through your website to find the pages and information they need. Effective navigation creates a smooth user experience and improves your audience’s impression of your website and your nonprofit in general.
Consider the following navigation elements and how you’ll incorporate them into your website:
Main menu: It’s typically recommended to include a limited number of main menu items to simplify your navigation and make it easy to understand. Carefully choose five to seven categories that make the most sense for your main menu items. Most nonprofits have menu items such as an About or Programs page, Impact Stories or Testimonials, Ways to Get Involved/Donate, News/Press, and Upcoming Events.
CTA strategy. CTAs are an essential part of navigation. How will you use CTA buttons, links, and text to drive traffic to pages that are essential to your mission, like your donation form?
Internal search functionality. If your website houses a variety of online resources, an internal search engine can make it easy for visitors to find the information they need. For example, a healthcare-focused nonprofit might include an internal database for doctors in the local community or common health ailments.
The keys to effective navigation are simplicity and relevance. Your navigation should be easy to understand and each page should be relevant to a segment of your audience.
WordPress Themes for Nonprofits
As mentioned, your nonprofit can use either a pre-built or custom theme to build your WordPress website’s front-end styling. Learn more about the pros and cons of both options:
Prebuilt themes for nonprofits
Prebuilt themes are not an ideal solution for most nonprofits due to potential limitations and lack of flexibility. They need to be monitored for performance and accessibility. However, they are easy to get up and running and very budget-friendly for smaller nonprofits.
Here are a few theme options that many nonprofits use to build their websites:
A theme for purpose-driven organizations, with fundraising functionality, mobile-responsive pages, and logo, color, and font customization opportunities.
Most of these themes include some functionality for fundraising, CTAs, and other features nonprofits need to push their missions forward. However, pre-built themes offer limited customization capabilities and may not have all the features your nonprofit requires for your specific needs. Plus, they may not be as accessible, leading to potential usability issues for your online audience.
Custom themes for nonprofits
Most organizations will see the greatest success from their websites when they leverage a custom theme. Custom themes ensure that your website has all the functionality it needs and give your website a unique look and feel that can help distinguish your organization from similar nonprofits.
Work with a nonprofit website developer who specializes in WordPress. Kanopi’s experienced developers have helped develop custom-branded websites for nonprofits of all sizes and types. Kanopi’s professionals will research your unique audience and website needs to craft a theme and strategy that works best for your mission.
WordPress Plugins for Nonprofits
Plugins are tools that extend the functionality of your WordPress website by providing additional features. They are pre-built code packages that you can immediately incorporate into your site without additional coding needed.
When it comes to plugins, prioritize quality over quantity. Enabling too many could lead to security and performance issues if you’re using plugins that aren’t well-written.
Here are a few considerations to keep in mind when browsing plugin options:
Contributed vs. premium plugins
Contributed plugins are available for free through the WordPress Plugin Directory. They are typically created by members of the WordPress community on a volunteer basis. They are usually open-source, meaning that anyone can alter the source code for their unique plugin needs.
Premium plugins require a fee and are usually developed by professional software developers. Often, premium plugins have additional advanced features to assist with your goals. They tend to be more dependable when it comes to security and support.
Types of WordPress plugins
There are a few common categories of plugin functionality that nonprofits can consider, including:
Search engine optimization (SEO) plugins: Support SEO strategies with tools to add metadata to web pages and content, such as meta descriptions, page titles, and optimized URLs.
Security plugins: Help keep your website safe by monitoring for malware, blocking attacks, and sending security alerts. Security plugins are less necessary when you choose a secure hosting provider.
Performance plugins: Enhance site performance by improving caching, optimizing files, and streamlining your database. Similar to security plugins, performance plugins aren’t required when you choose a website host that prioritizes fast load speeds.
By working with a developer, you can understand the types of plugins that will best fit your website’s needs and which ones aren’t worth the investment.
WordPress plugin examples
Because it’s important to use plugins sparingly, look for tools that are recommended by established software developers. This will ensure you’re choosing plugins that help rather than hurt your site’s performance. For example, Kanopi recommends the following plugins:
ACF. ACF is a powerful, multi-use plugin for organizations looking to keep their sites as streamlined as possible. Developers can use ACF to create a wide variety of site features, such as customizable CTAs, media galleries, graphs and charts, timelines, and other advanced features.
Yoast. Yoast is an SEO plugin that helps organizations create SEO-optimized content to drive more traffic from search engines. Yoast offers suggestions to improve SEO performance, helps create a solid internal linking structure, manages redirects, and more.
Wordfence or Solid Security Basic. These are two of our recommended security plugins. They both help keep your website safe by stopping brute force attacks, offering secure login protocols, and scanning to detect vulnerabilities in themes and plugins.
PhastPress. PhastPress is a performance plugin that can manage all performance needs in one tool. It optimizes images, employs native lazy loading, and loads scripts asynchronously.
Our experienced developers have tested and used these plugins successfully on many websites, confirming that they will help optimize your site’s performance without compromising speed or security.
Examples of Nonprofits Using WordPress
Millions of nonprofit websites run on WordPress. Here’s a look at five examples, along with insights from Kanopi’s support services for each site:
Physicians for Human Rights
Physicians for Human Rights is a nonprofit that investigates and documents human rights violations while promoting medical ethics. Their website features a clean, professional layout, dynamic reports, and multilingual functionality.
The ACCFB helps connect those in need with different food sources. Their website offers a fresh, mobile-friendly interface, user-friendly pantry location map, and action-focused CTAs.
PEN America is a nonprofit devoted to the advancement of freedom of expression in the United States and worldwide. The organization’s website features a modern, distinctive design, a robust news and updates section, and easy-to-navigate research and reports.
Catalyst prioritizes accelerating progress for women in the workplace. Their WordPress website includes interactive reports that can be translated into other languages, micro-learning, free online courses, and a robust research library.
First Tee is a nonprofit that empowers kids with life skills and self-confidence through the game of golf. The First Tee website offers seamless access to member websites, a simple donation page, and compelling stories of how the nonprofit has supported children.
How to Fundraise Effectively Using WordPress for Nonprofits
In the digital age, making giving simple and convenient for supporters is vital to securing more donations. Using WordPress, you can grow your website into an efficient, secure online fundraising tool.
Promote online giving by taking these steps:
Add a streamlined donation page. Provide a simple, easy-to-use donation form for supporters to use. Ensure the form only asks for necessary information, like donors’ names, donation amounts, and payment information. Embed the donation form directly into your website so supporters don’t have to visit a third-party platform to give. And make sure your form is accessible and inclusive.
Offer a secure payment processor. A payment processor is a tool that manages donors’ financial information when they submit a gift. Your payment processor should include a variety of security features, such as PCI compliance, data encryption, and fraud protection. A secure payment processor keeps donor data safe, giving donors greater confidence in the giving process.
Consider plugin-based giving options. You can also use a donation plugin to manage your online fundraising. For example, the GiveWP plugin offers features such as customizable donation forms, donor management, and fundraising reports. This helps you keep track of giving trends and donor information to improve your stewardship efforts.
Make sure your payment processor can accept a variety of payment methods, such as credit/debit cards, ACH direct deposits, PayPal, Google Pay/Apple Pay, and other methods that appeal to your audience. This can make the giving process more convenient because donors can use their preferred payment method or the payment method they have on hand.
Content Tips for Your Nonprofit WordPress Website
After planning out your WordPress website and strategizing your online fundraising process, it’s time to fill your website with content. Your content is what brings your nonprofit’s mission to life online. It should align with your nonprofit’s values and mission while reflecting your branding.
Write for the web. Writing for the web is slightly different than your nonprofit’s other communication platforms, like direct mail. Your web content should use simple, plain language and avoid jargon. Incorporate second-person words like “you” more than first-person pronouns like “we” or “our.” This keeps the focus on your supporters and constituents rather than on your nonprofit.
Develop an SEO strategy. SEO optimization helps improve your website’s rankings in search engine results. Follow SEO best practices like optimizing your pages and blog posts for specific keywords and using a clear internal linking approach to connect relevant pages.
Incorporate multimedia elements. Elements like video, images, and audio can help break up text blocks and provide visitors with multiple ways to engage with your site. Use photos that show people’s faces to create an emotional connection. Include video testimonials from staff members, volunteers, and community members to emphasize your nonprofit’s credibility.
Create a blogging plan. Your nonprofit’s blog is a great resource to share information about ongoing projects, programs, and campaigns. Consistency is key to maintaining blog traffic. Develop a blog posting schedule and assign team members to different roles, such as writing and photography. Coordinate with your social media manager to promote blog posts promptly.
Make your content accessible. Include alternative text for images, captions for videos, strong color contrast and bold lettering in your infographics, and other accessibility considerations that make your content easy to interpret and interact with.
Cultivate a tone of voice throughout your content that aligns with your nonprofit’s values and mission. For example, a nonprofit that supports children’s healthcare might use a lighthearted, playful tone, while an organization devoted to researching climate change solutions might have a studious, serious tone.
Tips to Maintain a Healthy WordPress Website
New data management and website security best practices and measures are created all the time. To keep your website healthy and secure, you must devote yourself to ongoing WordPress maintenance.
Core updates: WordPress core is the foundation of the WordPress CMS. The WordPress performance team is constantly working on new versions of WordPress core that contain performance improvements, new security updates, and new features for WordPress users to take advantage of. Keep an eye on the WordPress core blog for updates and to know when it’s time for a core update.
Theme and plugin updates: Pre-built themes and plugins also receive updates from time to time for similar reasons—to improve features and offer greater security. Refresh your theme and plugins at regular intervals, such as quarterly, to stay up to date with new releases.
Caching: Caching is when a browser or server saves a version of your website to deliver faster loading times the next time a user visits the site. You can use different caching methods for your WordPress website, whether page caching, browser caching, server caching, etc. Determine which method will work best for your website and check in on the process over time, as your needs may change.
Data optimization: Your website’s data files will become more complex over time as you add new information and connections between data. Be sure to regularly optimize and simplify your database to reduce clutter. It’s easiest to work with a web development professional to thoroughly clean your website and ensure it’s optimized for peak performance.
Accessibility: Accessibility best practices continually evolve as new assistive technologies are released. Make sure to stay up to date on the latest accessibility guidelines and assistive technologies to make your website compatible.
The most effective way to keep your website healthy over time is to form a relationship with a professional web development team that can get to know your website and your nonprofit’s unique digital needs. Professionals like the Kanopi team stay up to date on the latest WordPress releases and best practices. We can work with you to understand your audience and enhance your website for optimal performance.
WordPress for Nonprofits Resources
Looking for more support as you dive into the world of WordPress? Here are some helpful resources to consider:
Read Kanopi’s blogfor the latest updates on WordPress, content strategy, and other web design and development news
Watch WP 101’s tutorial videos to deepen your WordPress knowledge and troubleshoot common issues
Contact Kanopi’s WordPress team if you’re looking for a dedicated partner to support your WordPress development