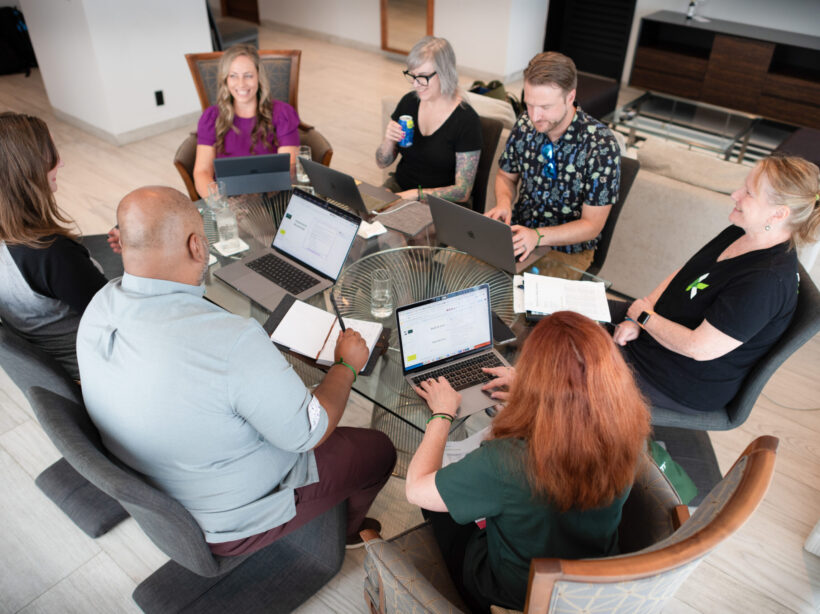
Aerial shot of Kanopi leadership around a table working on a project with laptops open.

How to write a winning RFP

Starting a new website project can feel overwhelming. Finding the right agency — one that truly understands your needs and can deliver effectively — is crucial. The best way to set yourself up for success? Ask the right questions from the start. But equally as important is providing as much clarity as possible in your Request for Proposal (RFP), ensuring that the responding agencies can offer accurate estimates and informed responses.

For large organizations with multiple decision-makers (we’re looking at you higher education and healthcare!) this process can be even more complex. Procurement requirements, departmental priorities, and differing opinions can make alignment challenging.

We see a lot of RFPs … ones that are 100 pages long and full of legal and procurement boilerplate, to those that are just three to five pages (and in case you were wondering, we prefer the shorter, more concise ones that get to the heart of the problem). So we have thoughts on what makes a great RFP.

To simplify the process, we’ve created an RFP template to serve as a foundation for your next website project. Our friends at the Drupal Association have written an RFP template as well specifically around open source projects.

As you work through the template, here are a few essentials to keep in mind:

  • Know your goals. Align with your internal teams in advance of the RFP process to define (and align) your needs.
  • Think in terms of building a long-term relationship. A good partnership with your vendors is key and should be established from the beginning. Do you like them as people? Can you imagine being on hours of calls? Choose an agency you can imagine collaborating with for years.
  • Be transparent. Clarity will benefit everyone. The clearer you are, the stronger and more customized the proposals you’ll get.
  • State your budget. This is a big one. When you include a realistic budget range, agencies can tailor their recommendations and avoid over- or under-scoping. It saves everyone time, builds trust, and ensures proposals are grounded in what’s achievable. Also consider reserving some percentage for contingency.  
  • Don’t be overly prescriptive. Describe your challenges, not the exact solutions. Good agencies are gifted at coming up with expert solutions to challenges that are stated in terms of problem statements or business objectives. Keeping an open mind will allow you to see (and compare) your prospective vendor’s recommendations and benefit from their expertise. 
  • Give yourself and your vendor enough time. Start the RFP process before your need is immediate to avoid extra pressure on both sides to meet an unnecessarily tight timeline to respond. Allowing more time can also mean more considered and complete responses.
  • Talk to your potential vendors ahead of time. This allows you to establish the relationship and pre-select the ones you suspect will be a good fit. The right vendors can provide a lot of value early in the process, which may even help inform the scope or direction of the RFP. Even better? Complete your strategic planning first to get extra clarity.

If you use AI to write your RFP:

AI tools can help you get started faster, but be careful: they tend to add unnecessary detail (and bloat equals a higher budget). To keep your RFP sharp:

  • Begin with a clear problem statement and desired outcomes.
  • Ask AI to outline sections, not write a full document.
  • Review, refine, and delete anything that doesn’t add value.
  • Separate “must-haves” from “nice-to-haves.”
  • Always have a human proofread any AI parts of your RFP to sanity-check the output against your goals and budget.

What’s next?

Once you’ve written that RFP and gotten responses back, it’s time to choose your vendor! We’ve also got advice on how to evaluate the RFP responses you receive.

Kanopi’s Allison Manley gave a presentation at the NTC Conference on how to write a winning RFP. Check out her presentation below to get more in-depth information.

A Decade of Data: UC Berkeley I School Case Study

The Berkeley School of Information (UC Berkeley I School) contacted Kanopi Studios with a robust request: a redesign of their website, guidance on the modernization of development techniques, and a full migration of their site to the newest version of Drupal — which meant moving over 10 years of content.

This kind of request wasn’t unusual for us. Higher education clients are unique in that they are a lot of things to a lot of people. Audiences include academic peers, laypeople, current students, and prospective students. There are often competing goals and priorities, all of which need to be examined and addressed.

The answer to meeting the complex needs of higher education clients is always the same: start with research. With I School, our first stop was discovery. We had to figure out what we had to work with. That meant working closely with I School to determine content types, decide what information was still relevant, map the content to the new site, and gain clarity on the specific content that needed to be migrated during the development phase.

Then we set out our deliverables:

  • Drupal migration
  • Redesign
  • Training
  • Development pipeline
  • Responsive theming

We used a persona-driven design process that started and ended with the user. We asked the questions, “Who are we trying to attract?” and  “What do they want to see?” We blended the classic elements of UC Berkeley with a modern look and feel that would attract prospective students, while at the same time making sure the design would maintain the same high quality across a variety of platforms and devices.

In order to modernize the development practices used for I School’s site, we reorganized the way code and files were structured and refactored some of the custom modules so we could take advantage of newer tools in Drupal 7, such as the Database API, Panels, and various caching methods.

We also provided I School with a full platform for continuous software delivery, with automated deployments to the development site and scripted deployments across all environments. The bottom line? Less downtime and a more responsive site.

“It was a great pleasure to work with Kanopi on our website redesign project. We faced a daunting challenge migrating our highly customized site from one version of Drupal to another, while simultaneously moving to a completely new responsive visual design. The Kanopi team’s expertise and enthusiasm were critical to the success of our project. We couldn’t have done it without them!”

– Kevin Heard, Senior Director of Information Technology, UC Berkeley School of Information

As they say, the proof is in the pudding. In the weeks since the new site launched, measurable improvements are already being noticed by site administrators and, most importantly, by the users! Here’s a snapshot of the improvements:

  • Sessions increased by 4.29%
  • Users increased by 3.11%
  • Page views increased by 22.30%
  • Pages/session increased by 17.26%
  • Average session duration increased by 11.33%
  • Bounce rate decreased by 1.42%

From research to organization to design to modernization, our decisions were driven by data every step of the way. Contact us today to discover how we can transform your site and help you meet your goals.

SFCM blog

Symbiosis FTW: Better Living Through Partnerships

“Mutualism” is a fancy term for a mutually beneficial, symbiotic relationship between two entities in nature. Organisms, from simple to complex, team up and help each other to the benefit of both; resources that may be scarce for one organism are easily provided by the other. So, how can mutualism apply in the agency world? The modern approach to building technology-agnostic experiences, allows the evolution of the User Experience and Design to lead the executional decisions on “how” (the technologies) to build the “what” that has evolved. At times, firms look for a partnership to complement their team. Therefore, mutualism with other agencies can become an extension of the firm and seamlessly keep projects moving forward.

At Kanopi Studios, we feel that a symbiotic collaboration of great minds breeds great work together! That’s why we are proud to highlight our partnership with Mule Design Studio on the San Francisco Conservatory of Music (SFCM) website.


San Francisco Conservatory of Music gives students the framework and foundation to succeed throughout their studies and careers, creating a path of lifelong learning. In partnering with Mule Design Studio, SFCM was looking for a full web transformation; one that would showcase the Conservatory’s unique mission and offerings. The goal was to delight prospective students and their parents and provide pathways to relevant content inspiring them to want to study at SFCM. SFCM also wanted a robust and manageable content administration process.

Mule expertly constructed an experience to propel the brand experience and accomplish these goals, then chose Kanopi Studios as their Development Partner to bring the experience to life.


“We seek development partners who specialize in implementing state-of-the-art web experiences. Kanopi’s decade-plus experience in Drupal development, their ingenuity, and their people are why we chose to work with their studio. Mule takes a holistic approach to strategy, design, and technology, and selecting a partner like Kanopi to be a part of delivering a successful site is imperative.”

– Mike Monteiro, Mule Design


Kanopi constructed a dedicated multidisciplinary team to perform technical guidance, feasibility and executional services for the project. Together, Mule and Kanopi provided thought-leadership on real-world implementation and actualization of design, while building a blueprint for the end user’s experience, both visually and technically. The partnership between Mule and Kanopi was seamless, and the teams strived to provide a unified experience for the end client.

As with many projects, there were complexities. In this case, the end-result needed to be more of a customized web solution. Not only did the experience require carefully crafted content, the sheer volume of content required a mindful execution for the front-end to be flexible to accommodate it, as well as the CMS administration that powered it. There were also integration points, such as an EMS calendar system. In order to further integrate the calendaring system into the experience, we were able to create a customized model to group related taxonomy with events on the calendar and create a guide that SFCM could build out and load content into as needed.


“Kanopi conducted a thorough technical discovery phase to inform and define the technical specifications for the project. These were outlined in a scope document for the client and included all third party integrations. It also mapped our implementation plan, defined parameters, and called out specific criteria for the build. Throughout the project, Kanopi provided further detailed plans for the client around each milestone: CMS Training, Content Entry, QA Testing, and Launch. This documentation enabled a smooth, on-time launch.”

– Maggie Glaize, Mule Design


Alignment between Mule and Kanopi was critical to provide a unified execution, but the end client’s partnership with the teams was just, if not more, pertinent. SFCM assembled a multi-skilled team to tackle the project and methodically navigated stakeholders on their side to gain buy-in and lead the effort. The project success was an absolute collaboration between several organizations all working diligently toward common goals, and leaning on each other throughout to successfully launch the experience.

In nature, measuring the precise benefits to the individuals in a mutualistic relationship is not always a straightforward process, particularly when organisms can receive benefits from a variety of sources. By creating lasting, trusted, ongoing agency partnerships, Kanopi builds personal connections. The more we understand how our agency partners think, the more we can intuit what they need, and the more we can intuit project needs. Interactions between Kanopi and our partners are harmonious, as are the relationships we have with our end clients. 

Want to form a partnership with us on your next project? Contact us.
How to fine-tune your site content for RankBrain

RankBrain. It sounds like it could be the name of a diabolical character from an early ’90s cartoon who is trying to outsmart humans and take over the planet. In actuality, RankBrain refers to one of Google’s latest publicly announced algorithms. It is a type of machine computing (artificial intelligence) the search engine uses to help it rank websites in its search results. Or in simpler terms, RankBrain is Google’s way of handling overly wordy search queries.

In our most recent post for GoDaddyGarage, we break down what RankBrain actually is (It’s much more exciting than evil cartoon characters!) and how to harness the power of ‘Machine Learning’ to better optimize your website to reach your target audience.

To learn more about how we help our clients improve their online presence as part of our search engine optimization strategy work, contact us today!

Image by Hey Paul Studios via Compfight cc

403 Destination

403s or Access Denied pages. We have all been there and experienced them. They can interrupt a perfectly well-designed user experience as well as interrupt a developer’s work.

Recently, we came across a challenge with a login form on a 403 (access denied) page not properly redirecting to the original page after login.

If you’re not familiar with the flow here, if you hit page on a Drupal site that you do not have access to, usually because you’re not logged in, you get a page saying “Access Denied”. Good usability means having a login form right on that page so that if you do have access to the page you can log in and be redirected back to the page you were trying to access instead of having to navigate away to the user login.

Drupal allows you to set any URL as the 403 page, and in this case, there was one defined, but when the 403 page was loaded, there was no destination parameter set.

The destination parameter is used as storage for the ultimate page you want to be redirected to when completing an action such as logging in. This looks like “http://mysite.com/access-denied?destination=my-page“. Once logged in, you would get automatically redirected to “http://mysite.com/my-page“.

In order to fix this, we needed to ensure the destination parameter was being added to the 403 page URL, so we used a hook_drupal_goto_alter implementation to first check if we were getting redirected to the 403 page, then to add the destination parameter to the redirect URL, set to the current page path.

Here’s the code:

/**

* Implements hook_drupal_goto_alter()

* Ensure 403 redirect loads the current path as

* destination parameter

*/

function mymodule_drupal_goto_alter(&$path, &$options, &$http_response_code) {

if($path == variable_get(‘site_403’)) {

$options[‘query’] = array(

‘destination’ => current_path(),

);

}

}

Once you have added this code to your custom module, be sure to clear the site cache so the new function is registered, and don’t forget to test!

__________________________________

Above Code Courtesy of Paul Sheldrake

Nurturing Leads with Email Marketing

With all of the different marketing techniques, tech stacks and CRM platforms to source and convert leads, it can be hard to focus on which tool(s) you should invest both your time and financial resources in for maximum ROI. While referrals, advertising, PPC, direct web traffic, and networking are the most common ways of generating leads, one tactic that is more or less overlooked or just not executed to its full capacity is email marketing.

Email marketing may not be the sexiest of tactics but it is still the most effective way to reach and nurture leads. In our next post for the GoDaddy Garage Blog, we look at tactics to nurture leads through email marketing, as well as some tips and tricks on how to craft and send effective marketing emails.

Read the ENTIRE article and make sure to check back for more posts!

McKesson Giving Comfort Ruby on Rails Project

We converted a static Excel database into an interactive application that connects the McKesson Foundation with community partners – ultimately helping cancer patients receive much-needed comfort during their treatment.

It is so exciting to see our work generate results for our clients. When that client is a nonprofit that provides services to cancer patients, that work becomes even more meaningful. The McKesson Foundation provides cancer patients with non-medical direct services through a network of Cancer Care Community Partners – hospitals, treatment centers, and support organizations across North America. Their Giving Comfort program provides Comfort Kits to cancer patients through this network.

The network was managed through an Excel spreadsheet, administered by one person, which made sharing program information and expanding functionality nearly impossible. McKesson asked Kanopi to develop an online application that would support the expansion of the Giving Comfort to meet the McKesson Foundation’s growing needs.

Using an interactive Ruby on Rails Application, Kanopi worked collaboratively with McKesson to bring a new database to life –visually as well as interactively – to improve user functionality, display data and provide robust reporting to meet the organization’s program goals. Ruby on Rails combines modern graphic visualizations, a simple user interface, and a strong backend to interactively present data, allow users to search based on location, use geo-targeting to identify potential partners and run custom reports.

Using the client’s brand look and feel, we developed modern looking but visually engaging graphs to showcase their data. The new database now instantly displays the proximity of Community Partners to McKesson offices, facilitating the delivery of Comfort Kits to those in need and expand McKesson’s partnerships around the country and streamlining the work of our client Valerie Aubel, Product and Distribution Coordinator for the Giving Comfort program: “The database has made my job of managing the Community Partners EXPONENTIALLY easier and I am very grateful!!”

To learn more about ways that Kanopi helps nonprofit organizations reach their goals, visit our #kanopiforgood page.

Drupal logo with Drupal drop

Is Drupal the Right Platform for your Small Business?

Drupal is considered by many to be the Ferrari of open source content management systems. In the hands of a knowledgeable developer, the sky’s the limit in terms of what it can do. However, understanding how Drupal fits into the needs, expectations, and budget of a small business is crucial for successful deployment, ongoing maintenance and growth.

Read Anne’s blog post on the GoDaddy Garage website on how to determine whether Drupal is the right platform for your growing business or organization  GoDaddy Garage is a great resource for techies, web pros and small businesses alike to to keep up to date on the latest industry news and trends around web development, design, online marketing and more.

Read the ENTIRE article here – and make sure to check back for more posts!

Living the Themer’s Dream, and Taking Your Markup Back: 7 Contributions that Every Drupal Themer Should Live By.

Ok, so I’m biased. But I’ll say it anyways. Drupal is amazing. Between its strong answer to robust content management and the community surrounding it, we are practically living the dream. But it wasn’t always this way for me as a Drupal themer. Let me take you back in time….

Clean Markup & Semantics or Die.

Back in my day, (when we all had to walk uphill in the snow both ways) web standards ruled the internet world. Semantics and XHTML were words used reverently and not just kicked around. Designers/Front End Developers were known not only just showcase their slick and intuitive designs, but beamed with extra special pride as they prompted you also to “view the source”. Doing so showed that they were able to wrestle that complex design into the leanest, most minimal semantic markup up that code could muster. This was a code to live by. For Honor! For Glory! For…. ah you get the picture, though, right? So you can imagine the great dirty I felt inside the first time I viewed the source of a Drupal site. It was bad. Not just bad, it was insulting… It actually made me want to curl up into a little ball in the corner and start shivering.

Why, oh why are they doing this? I thought. Why is Drupal overloaded with classes and divs beyond what is reasonable? Why are there two thousand and two style sheets? Can this ever be wrangled? What can be done?

These are the questions that ran through my mind as I stared at my screen in disbelief facepalming the entire time. It was such to make one despair…

Believe it or Not….

So why do they do this? Believe it or not, there is a reason! Drupal core and module developers have no way of knowing or understanding every nuance that will go into each and every site that will be built on Drupal. And because of this, they try to account for as many possibilities as they can. Unfortunately, this means to bundle and wrap their code in as much structural markup as they can…. and while there are times that we simply cannot change this, there are ways that we can “tame the fires” of this woefully out of control drupal markup.

Sure you can modify the theme templates, but…

My initial approach to semantic and clean markup in Drupal was to tirelessly modify, create and override template files. And while this works, having 10 – 20 template files, (including views templates), didn’t seem reasonable. It was a bit unwieldy and not so direct for someone who would later support it to follow. There had to be a better way…

Contrib to the Rescue!!

Fortunately, there are many folks that share my sentiment and have decided to do something about it other than despair. They’ve contributed their own personal time and expertise to make our theming lives much easier. I’m always looking for great tools to boost my productivity and feed my fetish for clean markup. So you can imagine my delight as I discovered the following great modules (and base theme), and what they could do to help me have the cleanest possible markup that I could have on a drupal site.

Mothership – or Har!!! Walk da plank land luverz!

https://www.drupal.org/project/mothership

To quote the author directly:

“ Mothership is an HTML5 base theme that offers a workaround to Drupal’s obscure love for wrapping everything in 2 divs and slapping on 3 CSS classes wherever possible. Like other blank canvas base themes (eg Stark, Framework), this theme will NOT make your site look pretty. Unlike the others, it will do more to help you clean up the mess of excessive markup that Drupal provides out of the box, offering settings to optionally remove CSS classes in the markup.”

Mothership is wonderful. But it is not for the feint of heart! Upon installation of mothership, prepare yourself mentally, but do not panic! Your site will, and is supposed to look plain, blankish, black text on a white background. This is a good thing! This means all of those ridiculously extra divs and classes that come default with drupal are gone now! You have a blank canvas now. A tapestry upon which you can unleash all of your great drupal thematic imaginings.

Here is what Motherships configuration page looks like:

As you can see there are a plethora of options and adjustments you can make, anywhere from stripping out certain html divs to removing extra classes throughout the site. Go ahead and explore this page, and give some options a try. I’ve found them incredibly useful!

Mothership, (along with these other modules I’m going to discuss), has allowed me to take my markup back and regain the control that I felt that I lost when arriving to Drupal. Plus they have that totally cool pirate theme going on. And that alone….

Semantic Views

https://www.drupal.org/project/semanticviews
Screen grab demonstrating Semantic View

Semantic views is a module that is an oldie but still a goodie. One might think that views provide sufficient stripping of markup through the style options. It doesn’t. There are still markup woes when using default views with basic fields. Sure we can create and modify views templates, but semantic views make it so that I don’t have to. Upon downloading and enabling semantic views and going to the view you are working on, you will be provided with the semantic views formats. Using these formats will give you the formatting options that comes with it. You will be able to change both the format settings and the field settings:

Clicking on these settings gives you both container options, row options, and field options:

Screen grab demonstrating Semantic View

As you can see, you have a whole bunch of markup killing options here as well! Combined with the global: custom text field, and the field tokens, I can usually have any markup at my bidding. Any that I so desire. Yes. with semantic views, I truly am king.

Block Class

https://www.drupal.org/project/block_class

Block class is a staple in the themers module toolbox. It’s simple really. Have you ever wanted to add a custom class at the very top container of the block? Yes. Yes. and more Yes. That is exactly what block class does. All you have to do is install the module, go to that block’s settings and add your classes. And that’s all I’m gonna say about that.

Clean Markup

Ok. seriously. The module is actually named “Clean Markup” No fancy frills. No catchy splashes. Boom. That’s it. Clean Markup. This one immediately caught my attention. The clean markup and block class modules somewhat overlap in functionality. But not entirely. If you are going to use clean markup, however, you’ll likely not be using block class, as clean markup provides the same ability to add a class to a block as well. So what’s the difference? Clean markup simply has more options. It’s more robust. And it’s built improve markup woes in both panels and display suite.

The clean markup settings can be found in the visibility settings of any block:

Screen grab demonstrating Clean Markup

As you can see, it’s quite a bit more robust than the simple block class module. In addition to adding the classes of your choice, you can add additional attributes such as the role attribute and more. You can also use tokens and replacement patterns. Super cool, eh? In addition, you can specify the markup around the title, and content, or even hide the title through the settings themselves. And if that wasn’t enough It also provides you some pretty decent, stripped down layout options in both panels and display suite. I won’t get into all of that. You may go forth and discover.

Fences

https://www.drupal.org/project/fences

I hesitated to include this one because it’s a pretty vetted, well known and large module. And I know that the seething masses could say “What about panels!” But display suite addresses some very specific markup controlling needs in nodes especially, that I think is worth talking about. We all know what a “view mode” is right? No? View modes are those different display options that you see when you go to manage a node display. Drupal has these by default, however, display suite allows you to add your own custom View mode and, what’s more, select a layout for that view mode. Upon selecting a view mode layout, it makes other fields accessible to you that wasn’t readily available to you before. You will be able to drag and drop these fields in an order that you see fit, but what’s more, All of these fields will then have a cog next to it allowing you to access additional options for that node field.

tag, or tag that you just want to get rid of. And you can’t. And you don’t know why. And it’s messing with your day like a wasp would. Have no fear! Fences! Fences does one thing, and one thing really great. It simply allows you to wrap any markup you want around any field that you want. You can even decide to have no wrapper at all!

To do this all you would have to do is go to the field settings of that particular field:

Screen grab of Fences view

And that, my friends, is Fences.

Browser Class

https://www.drupal.org/project/browserclass

In a perfect world, all browsers would render our CSS exactly alike. That would be good times, and sailboats and noodle salad. https://www.youtube.com/watch?v=8shdlcJjAJ8

But we all know that life and browsers just are not that way. And it’s not your fault. It’s not even their fault. It’s just that way. So what do we do? Come to terms with it. Live with it. DEAL with it. And then we go use browser class.

Upon installation and enablization, browser class will add various classes to the body field indicating what browser that user is using so that you can address that problematic element accordingly. It will even include a browser version class. Here is what that looks like:

Each browser will have it’s own unique abbreviation. The above indicates that I am using the firefox browser (ff) and firefox 42 at that (ff42). Hey look! It even adds a class indicating that I’m on a desktop and that my operating system is a mac. Super Cool!

Good times. Noodle Salad.

Display Suite

I hesitated to include this one because it’s a pretty vetted, well known and large module. And I know that the seething masses could say “What about panels!” But display suite addresses some very specific markup controlling needs in nodes especially, that I think is worth talking about. We all know what a “view mode” is right? No? View modes are those different display options that you see when you go to manage a node display. Drupal has these by default, however display suite allows you to add your own custom View mode, and then what’s more, select a layout for that view mode. Upon selecting a view mode layout, it makes other fields accessible to you that wasn’t readily available to you before. You will be able to drag and drop these fields in a order that you see fit, but what’s more, All of these fields will then have a cog next to it allowing you to access additional options for that node field.

A picture really is worth a thousand words, and I can see you getting wrinkles all up in your brow, so here’s image for you to view:

Clicking that cog will give you the awesome options that come with it, Including some “field template” options. Choosing “Expert” mode will give you a bunch of field controlling, markup controlling, goodness that will allow you do things like: add any wrapper around that field, add field classes, control the label name and classes. And much much more. With additional modules you can control nesting and additional parent or child divs. It’s a lot of control packed into one crazy module.

It does a whole lot more, but for this article, I just want to graze over the semantic and markup control advantages display suite can empower you with. It truly is a robust module, and has somewhat of a high learning curve, but once you’ve used it, and you know it, you won’t be able to theme without it.

Display suite. Learn it. Use it. Love it.

So go now and theme, grasshoppa! Great power is given to you.

With the rise of Sass and HTML5, and other robust front end technologies, it’s easy to forget. However semantics and clean markup are still important!. Even more so now than ever before! It makes data portable, and more accessible to api’s and devices. More easily readable by any person or any machine. And It can bring context to both of those things. Drupal handles data well. Unfortunately it’s a hawt mess where Markup is concerned (lots of which is addressed in drupal 8). The good news is, that it can be wrangled!

I love finding great tools. It makes me feel happy in life. If I find a good one, and add it to my toolbox, best believe it’ll be well used. Great tools help us save time. They make us more efficient and help us do our jobs better. And for the drupal themer, these will definitely do that. So now you know some of my secrets. You’re welcome. You owe me lunch. 😉