Pelo Fitness spinning class

Drupal Security: 7 Strategies for Longterm Protection

One of the best things about Drupal is its security. When tens of thousands of developers work collectively on an open source project, they find all the holes and gaps, and strive to fix them. When one is found, patches go out immediately to keep sites safe and secure. But a site is only secure if those patches are applied when they are released.

Pelo Fitness is a Marin County-based community dedicated to a culture of fitness. They offer cycling, strength, yoga & nutrition programs customized to an individual’s needs and fitness level. Whether someone is a competitive athlete, a busy executive or a soccer mom (or perhaps all three), their programs are designed to build strength and endurance, burn calories and boost energy.

Yet their site was weak since they hadn’t applied a few major Drupal security updates. There was a concern that the site could be hacked and jeopardize client information. Pelo Fitness customers use the site to purchase class credits and reserve bikes for upcoming classes, requiring users to log in and enter personal information.

Want to keep your site secure? Contact us to get started. 

The solution

Kanopi performed all the security updates to get the Pelo Fitness on the latest version of Drupal. All out of date modules were updated, and the site was scanned for suspicious folders and code; anything that looked suspect was fixed. Care was taken not to push code during high traffic times when reservations were being made, so code was pushed live during specific break times that would allow for the least disruption. Lastly the site was also moved over to Pantheon for managed hosting.

Due to the Drupal support provided by Kanopi, the Pelo Fitness website is now protected and secure. Inspired to make all their systems stronger, Pelo Fitness also switched to a different email system as well so all their tech solutions were more up to date.

How to keep your site secure

Websites are living organisms in their way, and need constant care and feeding. It’s imperative to always apply critical security patches when they come out so your users information (and your own) is kept secure at all times. There are a few simple things that you can do on your Drupal site to minimize your chances of being hacked.

  • Stay up to date! Just like Pelo Fitness, make sure you pay attention to security updates for both Drupal core and your contributed modules. Security releases always happen on Wednesdays so it’s easy to keep an eye out for them. To stay up to date, you can subscribe via email or RSS on Drupal.org or follow @drupalsecurity on Twitter.
  • Enable two-factor authentication on your site. It’s a few seconds of pain for an exponential increase in security. This is easily one of the best ways to increase the security of your site. And besides, it helps you makes sure you always know where your phone is. The TFA module provides a pluggable architecture for using the authentication platform of your choice, and Google Authenticator integration is available already as part of their basic functionality.
  • Require strong passwords. Your site is only as secure as the people who log into it. If everyone uses their pet’s name as their password, you can be in trouble even if your code base is “bulletproof” (nothing ever is). The Password Policy module sets the gold standard for traditional password strength requirements, or you can check out the Password Strength module if XKCD-style entropy is more your thing.
  • Make sure you’re running over a secured connection. If you don’t already have an SSL (TLS, technically, but that’s another story) certificate on your website, now is the time! Not sure? If your site loads using http:// instead of https://, then you don’t have one. An SSL certificate protects your users’ activities on the site (both site visitors and administrators) from being intercepted by potential hackers.
  • Encrypt sensitive information. If the unthinkable happens and someone gets hold of your data, encryption is the next line of defense. If you’re storing personally identifying information (PII) like email addresses, you can encrypt that data from the field level on up to the whole database. The Encrypt module serves as the foundation for this functionality; check out the module page and you can build up from there.
  • Don’t let administrators use PHP in your content. Seriously. The PHP filter module can get the job done quickly, but it’s incredibly dangerous to the security of your site. Think seriously about including JavaScript this way, too. If your staff can do it, so can a hacker.
  • Think about your infrastructure. The more sites you run on a single server, the less secure it is. And if Drupal is up to date, but your server operating system and software isn’t, you still have problems. Use web application and IP firewalls to take your security even further. 

Contact us at Kanopi if you need help with Drupal security.

Image of MVP in task board

Defining a Minimum Lovable Product

Congratulations! Your Boss just gave you approval to build the website you’ve been pitching to them for the past year. A budget has been approved, and you have an enthusiastic team eager to get started. Nothing can stop you… until you receive the deadline for when the website has to go live. It’s much earlier than you planned and there just simply isn’t enough hours in the day, or resources available to make it happen. Whatever will you do?

Let me introduce you to the minimum lovable product, or MLP.

What is a minimum lovable product (MLP)?

You may have heard of a minimum viable product (MVP). Where a minimum viable product is a bare-bones, meets your needs solution; the minimum lovable product can be described as the simplest solution that meets your needs and is a positive step toward achieving your goals. It’s easy to view every aspect, every deliverable, as being fundamental to a project’s success. But when you actually look at each nut and bolt with a more discerning eye, you begin to realize that each component is not fundamental to the overall product’s success.

So basically the MLP is the sufficient amount of features your site needs to be satisfactory to your business goals for launch.

It’s important to note that an MLP is not necessarily a reduction in scope. It’s more a prioritization in the order for which things are addressed. The project team can circle back on anything that wasn’t part of the MLP. The goal behind an MLP is to deliver a functional product that you’re excited about, within the confines of the project.

When should you consider a minimum lovable product?

An MLP isn’t for every project, but is usually best leveraged when there is a restraint of some sort. I used timeline as an example in my opening, but as you know restraints can take many forms:

  1. Timeline: Maybe the deadline you need to hit, simply won’t provide enough time to complete all the work you have queued.
  2. Resource Availability: Perhaps there are scheduling conflicts, or limited resource availability during your project.
  3. Budget Constraints: Another possibility is that the budget just isn’t sufficient to get to everything you have on your list.

Regardless of the restraint you’re facing, an MLP can help you realign priorities, and expectations to compensate. But how do you go about evaluating your project for an MLP?

Need help with defining your MLP? Contact us.

How do you create a minimum lovable product?

When you’re able to parse the individual elements that are crucial to your website’s success into user stories and features, you’ll have effectively identified your project. But how do you actually go about separating the core building blocks that will comprise your MLP from the bells and whistles?  It all starts with goals.

Goals

Chances are that you already have a set of goals describing  what you’re hoping to achieve with the project. These ideally should be as specific as possible (ie. increase traffic) and ideally measurable (analytics). Without realistic, concrete goals you set the project up for failure. For example if your goal is to make people happy; chances are you’re going to have a hard time measuring whether you were successful. Establishing measurable goals will set the project up for success.

It’s not enough to know your goals, you have to be able to prioritize them. It’s simply not realistic that every goal be top priority. Try to narrow your priorities down to no more than three goals. Goals in hand where do we go from here in our quest to define an MLP?

Definition

Begin by thinking of all the factors that are needed for a User to accomplish a given goal. These could include anything from Layouts, to Features, to Content. Start a list of these factors:

  1. What are the things a User sees?
  2. What copy does a User read?
  3. What actions is a User taking while they navigate through the site?

Everything you write down while asking these questions should be in the interest of one of your priority goals. If an item isn’t directly contributing to accomplishing the goal, then it should not be on the list. If you’re not a subject matter expert that will be directly contributing to the work, you should connect with your team to determine the specific work that needs to be carried out for each of the items you’ve identified. Additional refinement, and further simplification may be needed to compensate for the restraint you’re up against.

By this point, you’ve probably realized that defining the MLP is a difficult task. The choices will be tough, and ultimately everyone is not going to get their way. What’s important is that the work you do strives to meet the goals you’ve set. This sometimes means detaching personal wants from the needs of the company. If you can tie the work back to this core philosophy, you’ll always have a strong direction for your product.

Time to get to work!

All done? Congratulations! You’ve now defined your MLP. Now you’re off to the races. Best of luck on the journey of building out your minimum lovable product.

Need help defining your MLP? Contact us. We’re happy to help.

Strata Center at MIT

Kanopi at Design 4 Drupal’s 10 Year Anniversary in Boston

Nestled right off Main Street in Cambridge, Massachusetts lies the Ray and Maria Stata Center on the campus of the Massachusetts Institute of Technology (MIT).  This abstract building designed by Pritzker Prize-winning architect Frank Gehry was the perfect venue to house the longest running, front-end focused Drupal conference in the US, Design 4 Drupal.  It demonstrates that the modern and abstract design Cambridge and MIT has seen can work perfectly with the structure needed within.

Image of sculpture at MIT that spells out "MIT" in metal, from the at Design 4 Drupal conference.

The Design 4 Drupal conference highlights training sessions and seminars focusing on designing for, and building the “front-end” of websites, or what gets seen and used by end users.  This area of focus encompasses graphic design, user experience, accessibility, performance, tooling, and much more.

Like a lot of our Higher-Ed clients, MIT is a user of Drupal, and is proud to offer this space to the Drupal community to learn and share knowledge.  I was pleased to be asked to present two sessions at the conference, and even more pleased with the knowledge I was able to take away from attending the event.

Meta and Schema: Defining the Content about your Content

The first session I presented focuses on designing and implementing a metadata strategy for your website.  Metadata is the content that describes your content. It is very important in how web pages are found in search engines, and how they are displayed on social network sites.

Image of Jim Birch's presentation in a large classroom with a projector screen at Design 4 Drupal

The presentation is a deep dive into the different specifications for meta tags and Schema.org schemas, how to decide what to markup, and then how to text and validate that you’ve done it correctly.

This session was not recorded due to technical difficulties, but the slides are available at jimbir.ch/meta-schema-drupal

Building a Better Page Builder with Bootstrap Paragraphs

The second session presented reviews the Bootstrap Paragraphs module for Drupal 8 that I developed and how it combines the power of the world’s most popular front end framework, Bootstrap, with Drupal Paragraphs, the powerful module that allows content creators to build layouts and structured pages using content components.

I have been working on this module since I first presented it at the BADCamp 2016 Front-end Summit.  The module installs a suite of components that allow content creators to quickly build out pages.

I love giving this presentation because I always get great feedback from people who use the module; who are going to use the module; or who are going to use my methodology to create their own version that fits their specific needs.  The module currently has over 25,000 downloads, and has had users from all around the world.

You can watch a recording of the session here.

Need help designing your website? Contact us and we can help

The Keynotes

The Building Blocks Of The Indie Web – Jeremy Keith

The conference featured not one, but two great keynotes.  On the first day author and developer Jeremy Keith, who was also in town for An Event Apart Boston, presented a session in which he encouraged a return from social media publishing to independent publishing.  It was a great reminder that the web was ham radio before it was cable, and can still be so.

Exploring the New Drupal Front-end with JavaScript – Dries Buytaert

The second keynote was given by founder and project lead of Drupal, Dries Buytaert.  Dries was the keynote at the very first Design 4 Drupal, so it was a special treat have have him back for the tenth anniversary.  His presentation reviewed the history of JavaScript on the web, API-first vs. API-only approaches and gave behind-the-scenes insights into Drupal’s JavaScript modernization initiative.

Design 4 Drupal Sessions

Thanks to Kevin Thull, and the organizers of Design 4 Drupal,  most of the presentations were recorded and are available to anyone at Design 4 Drupal’s YouTube channel.  There was a broad mix of different types of sessions that covered developers, designers, User Experience (UX), Accessibility (A11Y), and Tools.  Below are some highlights of the sessions I went to.

Web Accessibility Tips and Tools – Abby Kingman

Abby gave a session that was near and dear to my heart.  We are always learning about how to make our websites more accessible, and Abby’s presentation covered where to find current guidelines and specifications, and then when onto to review tools for testing.  There are lots of great links to follow from this one.

This session validated the approach we take at Kanopi to accessibility in design and development.  A lot of the tools and testing techniques were all part of our processes, and I look forward to exploring the ones I didn’t know about!

Webform Accessibility – Jacob Rockowitz

Jacob is the current maintainer and a prolific blogger and thought leader in the Drupal-sphere.  We penned an article in advance of this presentation where he reviewed his thought process, and recorded his presentation.  My favorite takeaway from this presentation was:

“Learning about accessibility can be overwhelming. We don’t have to be accessibility experts. We just need to care about accessibility.”

Kanopi has a long history of both building new and retrofitting existing sites to be WCAG compliant.  This presentation showed me that our approach, ongoing learning and iteration have us on the right track.

Variable Fonts and Our New Typography – Jason Pamental

I’m a big fan of Jason’s body of work, from his book, Responsive Typography: Using Type Well on the Web, to his blog, and frequent appearances on the Talking Drupal Podcast.

Jason’s deep knowledge of typography truly shows in this presentation that gives a brief history of type, how it moved from paper to the screen, and how the future of digital typography will be with variable fonts.

I look forward to exploring more about variable fonts with the designers at Kanopi.  The design possibilities, and the performance gains make these new tools very attractive.

Building a Living Style Guide with Herman – in Your Sass! – Chris Wells

In this technical presentation, Chris Wells, CTO of Redfin Solutions gave a nice overview of Herman, which uses SassDoc to reads comments in your stylesheets to build a static website  that is your style guide. It is not as extensive as a full blown style guide like Pattern Lab, but can be very useful for smaller teams.

This presentation has me researching simple style guide solutions.  Not every project has the budget or need for a solution like Pattern Lab, but since I already try to comment style sheets and templates, it makes sense to do it in a way that something like Herman or KSS Node can parse.

Thanks Design 4 Drupal!

Thanks to all of the volunteer organizers, especially Leslie Glynn, who was my point of contact before, during, and after the event, and in true New England fashion, made sure I took home some famous Boston cannolis for my mother.  Kanopians help organize a few different conferences across the states including BADcamp and MIDcamp, and we know putting on these conferences is a labor of love, so thank you!

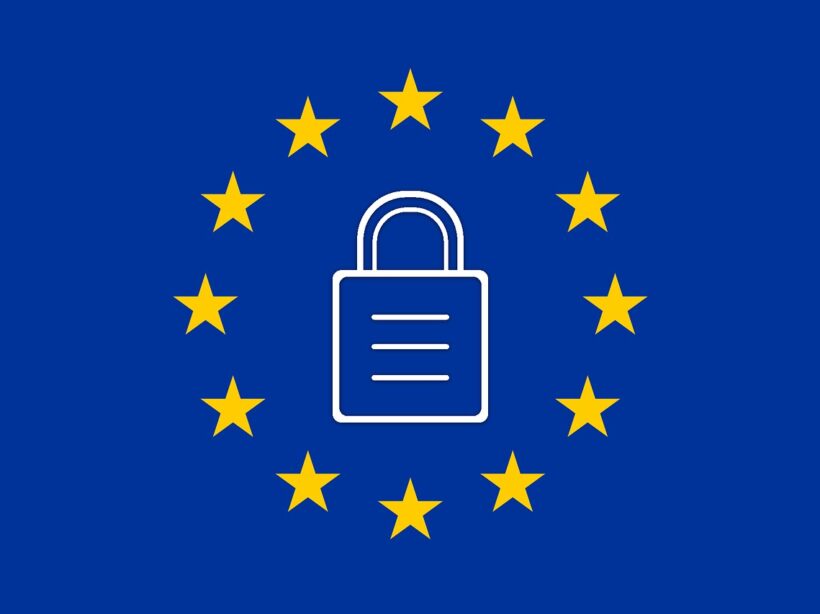
The General Data Protection Regulation (GDPR) is a big shift in the way businesses may process and control personal data within all 28 EU countries. The new law focuses on giving European citizens full control of their data. They control who has it, what they can have, and how they can use it.

The GDPR goes into effect on May 25, 2018. The consequences for noncompliance are hefty. Organizations found to be out of step with the regulations can face fines of €20 million or 4% of their worldwide revenue, whichever is bigger.

Does GDPR affect my organization?

Most likely. It is safest to assume that. Even if you don’t do active business in the EU, you may well have site visitors from countries protected by GDPR. It can be difficult, if not impossible, to passively determine who qualifies. Making your website compliant is the safest route, and the basics are fairly simple. However, GDPR affects much more than just your website.

We are not lawyers. We are here to help! But we’re not a substitute for talking to your legal counsel to ensure you’re complying with the new regulations.

What should I do if I market to the European Economic Area (EEA)?

If you company markets to users in the EEA, GDPR should be a focus for you. we recommend discussing compliance with both your legal counsel and with a security expert. We have a security ace on staff who can work with you to help create a plan for your site. Reach out and our team of experts will get you started. Reach out and our team of experts will help you get started.

What counts as “personal data?”

The GDPR broadly expands the definition of personal data. According to Article 4 of the GDPR:

‘personal data’ means any information relating to an identified or identifiable natural person (‘data subject’); an identifiable natural person is one who can be identified, directly or indirectly, in particular by reference to an identifier such as a name, an identification number, location data, an online identifier or to one or more factors specific to the physical, physiological, genetic, mental, economic, cultural or social identity of that natural person.

In less legal-sounding language, personal data is anything that can, in isolation or in aggregate, be used to identify a specific individual. The “in aggregate” piece is important. A person with a generic sounding name may not be easy to identify. But pair that with a physical location or a device signature and they absolutely are.

It’s important to note that cookies count as personal data, too.

What do I need to do know about GDPR and my website?

Here is a basic overview of some of the pieces of GDPR that will be most relevant to your online presence. That said, GDPR affects many more aspects of your organization than just your website.

Everyone loves a good memory device. I like to think of GDPR as something you can distill down to four Cs: Consent, Communication, Clarity, and Care.

GDPR greatly expands the definition of user consent. EU citizens have a right to know exactly what you are going to store and how you are going to use it. Any time you collect their information, make sure it’s okay with them first. Explicit consent is critical to all aspects of GDPR compliance. And a person must be able to revoke their consent, too, at any time.

This means that implied opt-ins, pre checked checkboxes, or consent given through some sentence buried deep in your terms and conditions won’t hold under GDPR. Consent must always be active and informed.

It also means that you can no longer box someone in to an all or nothing acceptance of cookies to use your site. Cookies required for the site to function are one thing. A user can’t opt out of those, or the site would cease to function. (Which is something you need to explain, given the need for clear Communication according to GDPR.) Things like your analytics cookies aren’t strictly necessary, though. Users must be allowed to opt out of them.

Similarly, it should be as easy to revoke consent as it was to give it. This applies to cookies, mailing lists, and any other data collection point. So if all it takes is a checkbox to get in… it has to only take a checkbox to get out again.

Ensure that third party partners you work with are in compliance with GDPR as well. Analytics platforms, mailing tools, CRM systems, and the like are all affected. You’ve probably started seeing notifications from your vendors about this already. There may be steps you need to take to keep your account current with the new regulations. If you haven’t heard from your partners, definitely reach out. Now is the time.

Communication: Informing your Users

Another major focus of the new legislation is the clarity and transparency of your communication with your users. Article 12 of the GDPR states that the data subject has a fundamental right to communications that are “in a concise, transparent, intelligible and easily accessible form, using clear and plain language.” This means no more “legalese” in your term and conditions or your privacy policy. Language must be easy to understand. You must be fully transparent about what you collect and how you use it to be in compliance with GDPR.

Chapter Three of the GDPR outlines the rights of the data subject in full. The first thing to tackle on the road to GDPR compliance is your privacy policies and terms and conditions. Ensure these notices make it easy for EU citizens to exercise their rights with regards to their personal data.

Clarity: User Rights

It is worth highlighting a few specific points in the rights of data subjects. These can affect how you may manage user data in the context of your content management system.

Users have the right to access and modify their personal data. Users must be able to request clear, transparent access to the data that you have collected on them. They have the right to change or request changes to their data at any time. The preferred scenario is giving them direct access to their own information. Profiles work well for managing this for logged in users.

Users have the right to portability of their data. Users cannot only request access to the full spectrum of data you have on them, but they can request that you hand it all over to them or to another party in a portable format. So ensure that users can download their history and any data you have collected on them directly from your systems to make this requirement as easy as possible.

Users have the right to be forgotten. At any time, a user can revoke their consent to your use of their personal data. They can request that all processing cease and that you destroy all copies of that data. So don’t collect or store more data than you absolutely need. Set up your sites to delete any stored content after a reasonable period of time.

Care: Data Protection & Retention

There is always an important distinction between privacy and security. You can have security without privacy. But it doesn’t work the other way around. There are some important steps you should do to take care of the data you do choose to collect on your site users.

Run your site over HTTPS. Hopefully you’re already doing this. This is what encrypts and protects the information transferred between your users and your servers. If you need help wrangling this, you can start with the talk I gave at the Nonprofit Technology Conference this year. Or reach out to us and we’ll help you get started.

Don’t collect what you don’t need. With GDPR, less is more.It seems like a smart idea to collect and keep everything you can think of about your users. GDPR makes that risky. Only collect what you need to meet your relationship objectives with your users. Let go of the rest. For forms, you’ll see your conversion rates go up this way, too.

Encrypt personal data. There are encryption modules for Drupal and encryption plugins for WordPress that will help with this. If you’re storing personal data on your websites, make sure that you are doing your due diligence to keep it secure.

Expire your personal data. This goes for data you have now, and data you’re collecting moving forward. Only hold on to data for as long as you need to. For some form plugins and modules, there are entry automation tools that can help with this. Or have a developer set it up a solution for you that will run at a regular interval.

Need help with GDPR? Contact us to help

Where should I start with GDPR?

This is the hardest part of all. Where to begin? Here’s our short list of the most impactful things you can do today to get ready for GDPR. The bad news is that if you’re just starting down this road, May 25, 2018 is right around the corner. The good news is there are impactful steps you can take now to get moving in the right direction.

  1. Check with your legal counsel. Learn how GDPR affects your organization and your marketing activities.
  2. Update your privacy policy and terms and conditions. Reference all the required “information to be provided” in Article 13 and Article 14 of GDPR.
  3. Update any form where you request personal data. Require explicit consent to having the information stored. Link to your (simple, clear) policy notices of how you process and use the data.
  4. Allow for more granular acceptance of cookies. Provide an explanation of the differences in the types of cookies you set on your site with a cookie policy.
  5. Check on your third party tools. Make any data retention adjustments needed as your vendors get ready for GDPR. As a Data Processor, this change in regulation affects them too. Most of our clients are using Google tools in some form or fashion. Here are some quick links to help you get your Google Analytics and Google Tag Manager accounts compliant.
  6. Start with a handy-dandy checklist! Create a roadmap for GDPR and what in your policies and procedures may need to change.
Project managers looking at a whiteboard

Keeping things on track: Website project management tips for clients

Amber
Amber Young

So your company is redesigning its website and you are going to be the project manager. You will be the one responsible for making sure that everything goes according to plan. You are probably excited! And maybe a bit overwhelmed as well. Good project management will make all the difference.

The more you know going into this process the better. Since we have managed thousands of digital projects at Kanopi Studios, we wanted to share our expertise to help you hit the ground running with solid project management.

Set clear and measurable goals

This is a critical step before getting started. Since your organization is investing time and money into its website, you’ll want to be able to prove it’s effectiveness and value. Think of all of the ways that a new website can support your organization’s goals and give some thought to how you could measure its impact. Having clear goals determined in advance will help your website vendors understand where to focus to deliver the most targeted solutions. It will also help you prioritize scope and features and prove the value of the site after it launches.

Find the right vendor

First, you need to write a strong RFP. Then, it’s on to selecting the right vendor for your project. You want to find a partner who you can communicate easily with, who has the expertise to do the job right and also meets your budget needs. To make things even more complicated, when you review the set of RFP responses, it is rarely apples to apples. The pricing and information represented in them will likely differ wildly. Be sure to ask each vendor what is included in their price. Some agencies will bid low to win your business, expecting that they will be able to issue change orders for more funds throughout the process. In general, you do get what you pay for, in websites as in other areas of life, so beware of the lowest bidder. And since your digital projects are probably only one part of your busy job, finding a vendor who is flexible, experienced, and trusted will help make things easier on you, leading the way to a successful outcome.

Gather (and wrangle) your stakeholders

Before your project ever starts, there is expectation setting to be done with your internal teams. We encourage you to establish a core team of approvers who will stay engaged throughout the project and understand the progression as decisions are made. Then, you’ll need to decide on the cadence for how you will share progress with the rest of your organization. Make sure everyone knows and agrees to their role in order to avoid last minute changes or requests that can throw off the process you have put in place. Consider documenting roles in a RACI chart for additional clarity. It can be to your advantage to use the project budget and timeline as a defense mechanism against new and last minute requests, as these things will have an effect on deadlines and dollars.

Keep vendors accountable

Work with your vendors to establish a cadence of check-ins and regular reporting on budget, percent complete, next steps, and risks. Ensure that you know what to expect from deliverables and when to expect them so that you can schedule time with the right people for reviews and approvals. Find out if your vendor uses a shared project management software platform that will allow you the ability to track progress, add tasks and keep all messages and files in a single, organized location. At Kanopi, we use TeamWork and have had strong success using it to increase transparency on projects.

Understand the creative process

During the UX and design process, your vendor will be establishing guiding principles that will carry through the project. The further the process goes, the harder it will be to change course. So if you aren’t sure about something, ask! It is always easier to adjust a strategy document or tweak a design than it is to rebuild something once it is in code. This should be a collaborative process, so we recommend frequent discussions and reviews to stay in touch on progress and get buy-in from your team.

Think about content early. Check in about content often.

Pay attention during the design phase to how content will be presented on the new site. Always be thinking: Do we have existing content to fill those boxes in the designs? Or will we need to create it? If there is new content to be created (as there most often is), do you have dedicated in-house resources to make this happen? Are your subject matter experts prepared to share details to help your writers deliver? Don’t forget that content also means images! We recommend making an internal content timeline that includes milestones and due dates to ensure that content delays don’t throw a wrench in your plans. If you don’t have the resources you need and are planning to hire, do this early on in the project so that your writers can be in aware of the strategy and design for the site. This will help speed their process, reduce rewrites and ensure that the copy is on target.

Requirements

While it can be hard to understand requirements documentation, it is important, because it serves as the blueprint for how your site will be built. Requirements should be presented in the form of user stories for the technical build to help put things in simpler terms and define expectations. A user story puts requirements into simple language and follows a common structure: As a (type of user), I need to (do something) so that I can (experience a result). While these may seem theoretical, they will impact the day to day reality for your content authors and site users. This is another area where you shouldn’t be afraid to ask questions to ensure that you know what you are approving and that you understand what it will mean once the site is launched.

Search Engine Optimization

With all of the activity prior to launch, SEO can fall through the cracks. It’s also a responsibility that may be split between your vendor and your internal team. With a little planning and coordination, you can ensure that SEO is in place prior to launch. Check in with your vendor about SEO, establish who is doing what and double check it all before launch. Moz has a handy pre-launch SEO checklist that lists SEO actions in priority order.

Need help with project management? Contact us.

User acceptance testing (UAT)

During this stage, your team will be reviewing the website and entering feedback prior to launch. Ideally, your team will have plenty of time to check the site thoroughly on all devices and browsers, clicking every link and paying special attention to more complex functionality including forms, transactions and interactive features. It is also ideal for your vendor to have enough time to address the issues that your team finds prior to launch. However, in reality, this process can be constrained by launch deadlines, making clarity and communication essential. Be sure to prioritize issues, making it clear which are launch blockers and which are nice to have fixes. Include the URL the issue was discovered on, the browser, device and version being used, details describing the issue and the desired fix.

Preparing for launch day

Talk with your vendor to make sure that there is a plan in place for launch day. Line up your core group up to test the site as soon as it is live and make sure your vendor will be available in case anything unexpected needs to be addressed. It’s best to delay announcing that the site is live until these final checks can be completed. We’ve even made a pre-launch checklist you can reference! If you need to announce the site launch in advance, plan the timing with your vendor and make sure there is enough buffer time to allow for a site review and bug fixes.

Don’t forget about support

Your project management has gotten you to launch. And yet, launch day in many ways is just the beginning! Inevitably your site will need something … whether it’s small bug fixes you discover after launch or some of those new feature ideas that came up in discovery but got put in the phase two bucket. In addition, keeping your CMS up to date and ensuring site security updates are in place is an ongoing and critical process. Website support is the answer. Having a support contract in place before launch ensures that you will not miss a beat and that you can evolve your site as you learn from using it, receiving feedback on it and examining analytics.

If you’ve followed these steps, your project management has gotten you far. If you need a little help getting farther, contact us.

Woman enjoying a website on her computer

Website Musts: How to Define Everything That Your Website Needs to Do

Woman enjoying a website on her computer

Every good, juicy story is built from three basic elements: a compelling beginning to draw the reader in,  action throughout the plot to keep people engaged, and a strong ending that wraps up the story elements in a satisfying way.

Like a good story, your website needs to draw your desired audience in, keep the user engaged, and offer a means for them to take the desired actions to complete their journey, whether that means making a donation, purchasing a product, or applying for a job.

In this post, we explore how to write that story. Or in other words, how to define everything it needs to do to create a proper customer journey on a website. Utilize this no-fail approach to outlining the needs and requirements of your organization and audience to ensure that everyone gets the results they’re looking for.

Chapter 1: Defining your Audience

All websites must start by defining an audience. If you don’t know who you are writing, designing, or developing your website for, your story will read like a complicated mystery that doesn’t end well for your brand.

Start with two incredibly valuable and fairly simple exploration activities that will help you 1) uncover your user segments and 2) craft value statements for them.

You can uncover your user segments by working through these simple five questions:

  • Who is this website / mobile app for?
  • Why will they use it?
  • When will they use it?
  • How will they use it?
  • Why will they keep using it?

As an example, we’ll use a Community Garden nonprofit organization looking to build a site to promote their events and information on healthy food choices.

Their target audience would likely be: Families and individuals looking for a way to eat healthy on a low income

Next, we’ll craft value statements, using a simple xyz formula:

For [target audience X]

that [cares about topic Y]

[your organization]

is a [your solution/product/service]

that [provides benefits Z]

The community garden would write a statement something like this: For families who are looking for a way to eat fresh and healthy food, Our Community Garden is an organization that provides opportunities for people to help grow, harvest and enjoy locally-grown produce.

Chapter 2: User Personas

User personas represent the different types of people who will interact with your website or product. These fictional characters can be based on real users or the types of users you’d like to attract to your site. Creating personas can help  identify the features and functionality that will needed on your website to support user needs. HubSpot provides a great set of questions that can can be the basis for your user personas. In addition, we have a few tips for creating effective user personas below.

  • Represent a user group for your website – Include existing clients or buyers. It can also be helpful to  consider users of competitor websites.
  • Write your personas as if they were real people with backgrounds, goals, and values. Include the four pillars:
    • Geographical – country, city, population, density
    • Demographics – age, gender, family size, occupation, income, education
    • Psychographic – lifestyle, personal values, activities, interests, opinions
    • Behavioral – occasions, usage, readiness
  • Express and focus on the major needs and expectations of your most important user groups and don’t be afraid to prioritize them.
  • Describe user’s expectations and how they’re likely to use the site
  • Express common concerns and objections

Chapter 3: Tactics to Create User Personas

Here are some basic questions that can help to define your user personas.

  • Define your priority initiative. What triggered the user to visit and browse your site?” Example: A flyer sent home from your child’s school about your weekend gardening program
  • Identify the factors that will define success and what this will look like. What is the result or outcome they are expecting from visiting your site and what might prevent them from achieving this result? This could be easily finding information about dates and locations of weekend gardening programs.
  • Frame out all the potential barriers (and don’t be afraid to be honest). Barriers could include a poorly designed homepage where events are difficult to find.
  • Agree on your decision criteria. What criteria would the visitor use during their evaluation of your offerings? For example, ease of finding event locations and times.
  • Map your conversion path.What is the key factor that will trigger the decision to act? What resources will they trust in helping them make a decision to move forward? For example, knowing that their child’s’ school is sponsoring a gardening day through the community gardening program may motivate the parents to participate.

Don’t forget to review your current data – it will speak volumes. Look at your site’s analytics for at least the past 6 months, focusing heavily on the “Audience Reports” within Google Analytics. This information can feed directly into your user demographics.

Additional approaches to acquire data include:

Interview your internal sales, customer service or support teams. Their interactions with your clients can provide a wealth of first-hand insight.

Administer a survey to your users. Set up a simple survey on your website through a third party program or webform like SurveyMonkey. Send the survey out to your email list to expand your reach and results.

Interview your audience. Establish a set of basic questions, then reach out to your users or clients to schedule an in-person, phone or online interview. Consider offering an incentive like a discount or coupon or small gift to make it easier to secure interviewees and to show your appreciation for their time.

The bottom line: any research is better than no research. It doesn’t have to be complicated or costly to be effective, so don’t skip this crucial step!

Chapter 4: User Stories

Start by establishing your organization’s objective (the action you want the user to complete on your site). Next, extract the objectives, needs, and desires of your users as defined in your user personas.

Then, fill out the following template:

As a [type of site visitor] I need a way to [do something] so that I can [benefit somehow]

Don’t forget to let your value statements be your guide to ensuring that user stories map to high-level user goals.

Chapter 5: Defining Features

What are the actions your users need to take on your website? These should correlate to features, which can include everything from downloading a program schedule, to contacting you for more information, to  registering for a class online.

For example:

Action: Families need to be able to see a list of nearby gardening events that are appropriate for their children.

Corresponding website feature: An event content type that can be sorted by date, age range, and geographic location.

Happy ending

Using the information from your user personas, map each user’s tasks to create a feature and functionality document for your website. Through this process it’s common for the highest value features to be consistent across multiple personas and rise to the top. These become your site’s core features. Any additional features become your subset features. Depending on your budget and timeline, you can start by developing your site’s core features and save your subset for subsequent releases or when additional budget is available.

Finding the sweet spot between your organization’s needs, your user’s needs and your technical needs will ensure strong results and a happy ending for your website project.

If you or your organization needs assistance with creating a customer journey on a website, contact us today! We can work with you on any aspect of this process, from developing personas to crafting user stories to defining feature requirements.

Old Card Catalog

Structured Data: Architecting SEO Magic

I am fond of saying that I love to “put things in things.” I am a serial organizer, who can’t go anywhere near a Container Store. By trade I’m an architect, which means organizing and structuring information into logical constructs. In this regard, my brain is a lot like a search engine; seeking comprehension through pattern identification. There are patterns you’re probably familiar with if you think much about SEO. The order of your heading tags, for example. But one you may not be as familiar with is structured data.

“Structured Data” is best defined as schemas that are used to describe the contents of a web page. You can think of a schema like a highly structured form you fill out. On a form, you have a series of labeled fields and you fill in a snippet of information next to each one. Your first name, your last name, your address. Structured data does this with blocks of information on your web pages.

This concept was developed by the major search engines — Google, Microsoft, Yahoo, and Yandex. The schema are all available on Schema.org, the de-facto standard for using structured data. By using these patterns, search engines are more easily able to parse, rank, and understand your content. And because they have so much more information about what your page contains, they’re better able to serve it in rich placements right within the context of their results pages.

Schema are implemented in a variety of different technologies. There are three major ones in play.

Microdata – this is the format originally used on Schema.org. Microdata feels a lot like regular attributes in your HTML. You apply it in the context of the markup already in your page. If you can’t read HTML, you’ll have a hard time understanding and debugging Microdata.

RDFa – RDFa feels very similar to Microdata, but it is XML flavored. Again, it’s inserted in the markup that already exists around your content. And it’s equally difficult to make sense of it if markup isn’t your thing.

JSON-LD – This is the new kid on the block, and it has a lot going for it. As a JSON-based format, it’s an object that lives outside the context of the content it’s defining. It can easily be injected into your document. While it creates a little redundancy and is dissociated from your content, it’s much easier to insert into an existing project, and it’s easier for a human to read.

Not all the schema are created equal when it comes to SEO. Search engines care more about some of them than they do about others. And not every search engine has adopted JSON-LD as of this writing – for example, Bing doesn’t technically recognize JSON-LD (although they actually do seem to be parsing it in some limited contexts, like recipes). And while Schema.org has detailed notes on what information is “required,” search engines may be looking for different things. Google provides a great introduction to structured data coupled with a Structured Data Testing Tool that are hugely helpful if you want to get started with how to best leverage schema on your site.

All that said, if you’re just getting started with structured data, I’d recommend implementing with JSON-LD first. It’s the emergent standard and ultimately the easiest option to maintain.

Want to talk with one of our experts? Contact us

Working with structured markup and JSON-LD in Drupal or WordPress

For Drupal, check out the Schema.org Metatag module. It’s still pretty new, but the contributors have done great work here. I’m excited to see where it goes. Drupal Core ships with RDFa support, which is fantastic! But it isn’t mapped to Google’s expectations, and extending it ends up getting you into custom code pretty quickly.

For WordPress, check out the Schema or Markup plugins. They support slightly different schema out of the gate, so one or the other may be optimal depending on your needs.

A deeper look

I gave an overview of Structured Data at BADCamp 2017, introducing these concepts and talking about what’s available for use when you’re building sites in Drupal. Feel free to take a look. I’d love to hear your thoughts and feedback, and to find out how structured data is working for you and your organization. And if you need our help with your data, contact us.

Mukurtu: A Safe Keeping Place for Sacred Materials

Designed in partnership with indigenous people to preserve cultural heritage.

Ten years ago, an anthropologist named Kim Christen from Washington State University was visiting the Warumungu Aboriginal community in Australia, when it became apparent to her that their challenging task of cultural preservation could be significantly aided through a custom-built online tool. She applied for, and received funding for the web development of such a tool, and Mukurtu 1.0 was born. Some years later, the California-based Center for Digital Archaeology had joined the effort, and Mukurtu, having been well-used already and showing great promise, was slated for a complete rebuild with a fuller feature set. Kanopi Studios landed the contract, and I became the chief developer for the launch of Mukurtu 2.0.


“Mukurtu (MOOK-oo-too) is a grassroots project aiming to empower communities to manage, share, preserve, and exchange their digital heritage in culturally relevant and ethically-minded ways… Mukurtu is a Warumungu word meaning ‘dilly bag’– a safe keeping place for sacred materials.”

– Washington State University


Mukurtu was my inaugural Kanopian experience, and I was delighted to be hoisted into a position of developing socially-relevant technology. I believe there is a special potency where ancient culture meets modern technology.

Architecture

By the time of my arrival, Kanopi had already architected the fundamentals of the Mukurtu 2.0 platform, based on Drupal 7. Mukurtu is installed via a custom profile. A site may be installed and hosted by Reclaim Hosting, or a community may freely download Mukurtu from Github and install and host it themselves. In a Mukurtu site, there are Communities which are groups within the larger community. Within Communities, there are Cultural Protocols, which are also member-based groups. Communities are managed by Community Managers, and Cultural Protocols are managed by Protocol Stewards. There are other roles within each as well. This is all provisioned by Organic Groups.

The primary piece of content is a node type called a Digital Heritage Item (DH item). All such content belongs to a Cultural Protocol (CP), and thus also to a Community. We use a custom widget to select the Community and CP dynamically. DH items can belong to more than one CP, so there is an option of sharing the item with people that are members of any of its CPs or sharing it only with people that are members of all of its CPs.

A Digital Heritage Item is a relatively complex node type with five tabs of fields, but the most significant piece within it, other than the title and description, is the Media Assets. This is the actual piece of preserved culture, whether it be an image, a document, a video (uploaded or hosted on a video sharing service like Youtube), or an audio file (uploaded or hosted on Soundcloud). For this, we wanted the ability to use a single multi-value field for all media types. The Media module could not do this, so we went with an alternative — the Scald module. The original purpose of the Scald module was to make entities out of media, such that they were fieldable. That was no longer needed once File Entity was released, but Scald remained the only way to upload any media type in a single field. Among the fields on a media item are optional fields for Community and Cultural Protocol, so the permissions on a media item may exist in addition to the permissions on its parent Digital Heritage item.

So we have a complex permissions system that reflects communities with individually customizable needs, where privacy is a significant concern. The goal is to disperse, yet preserve, cultures that are rightfully sensitive to cultural appropriation. Given the complex permission needs, it was no surprise that custom permissions work was needed. In addition to stock OG permissions handling, I had to make combined use of all three of hook_node_access, the node grants system, and hook_search_api_query_alter. This is one of the pride points of my work on this project because it works well, and efficiently — the code for this is neatly summarized here.

Browse and Search

Browsing and searching are built on Search API, with a generous use of facets. The idea is to be able to easily plug in Solr when sites reach that capacity, but so far, things are running smoothly for all clients using Search API’s DB server. Search and browse results can be viewed in both list and grid views. Some heavy customization on Scald thumbnails is done here.

Mapping

Digital Heritage items can be assigned geographical points and browsed by map. Coming soon are the addition of lines and polygons geo-types, map clustering, a custom base map, a combined list/map view which respond to each other, a customized map legend, and rich popups when hovering on map items. I chose Leaflet over Openlayers, as the mapping library, for its efficiency, mobile-friendliness, and out-of-the-box great aesthetic. The drawback with that choice is that the Leaflet Drupal module is less mature than the Openlayers Drupal module. I’m very much looking forward to those mapping “coming soons,” some of which will have me contributing back to the Leaflet module.

Mobile App & Scald Services

The Center for Digital Archaeology built a mobile app to be able to view and create Digital Heritage items and their media from the field. On the server side, I used Drupal Services to build the resource. For the Scald (media) items, I built a custom Services resource. After sharing this on the Scald issue queue, the maintainer suggested I make a Drupal sandbox project out of it, which he would link to from the module page, so I did. At zero users, I can’t say it is heavily used, but it was nonetheless satisfying to share code with the community in a more official way.

Batch Import / Export

Already implemented, is the batch import and export of content (Digital Heritage items, media, Communities, Cultural Protocols) through CSV. A grant application is in for the import and export of DH items through XML using the Dublin Core standard, with additional support for the METS and MODS extensions of Dublin Core.

Extended Functionality

Collections are groups of Digital Heritage items. “Dictionary” is a taxonomy of words in a given language, with words enhanced within their own set of fields. “Categories” is a taxonomy to group DH items together independently of their Cultural Protocol. DH items can be related to each other. Community Records are records within a DH item (sharing the same Media Assets), with customized field values for different Cultural Protocols, so a given Digital Heritage item can be shared between communities, but also contain information private to each community. Book Pages allows one to organize DH items as navigable multi-page items. There are also many finer pieces of functionality beyond the scope of this article.

In The Funding Pipes

Still to come, is integrating Open Atrium’s discussion and calendar tools into the build, a rich and customized email notification system, and “file fixity” with scheduled MD5 and SHA checksum comparisons to assure indigenous communities that their cultural resources remain untampered with throughout time.

The Perfect Drupal Project

Mukurtu is a powerful yet tailored system which fully warrants the label “platform”. It is, in many ways, the perfect use case for Drupal. It is open source, the code is clean, and it serves a righteous purpose. It is a long-running project with steady improvements informed by the needs of an ever-growing, yet specific user base. Mukurtu is what I started with at Kanopi, and two years later it remains a significant project on my Kanopian horizon. I am grateful to be able to work on it in any capacity, let alone such a committed one, and I have our CEO, Anne Stefanyk, to thank for having the vision to invest in this genuinely beneficial Nonprofit project.

Design meeting

If it ain’t broke …

How to know if your site needs a total rebuild or a focused fix

Designers mapping out a website.

So your site isn’t working the way you want it to. Maybe it’s sluggish, or you’re not seeing the conversions you want, or customers are complaining. Before you drop a huge chunk of your budget on a complete rebuild, consider that there might be a simpler (and more affordable) solution to your website woes.

We see a lot of Drupal 7 and WordPress websites here at Kanopi Studios, and we often discover that it’s more cost-effective for our clients to simply update their sites rather than rebuilding them. Making targeted updates can allow you to focus on addressing a few key issues, while still leveraging the investment of time, energy and funds that went into your site’s foundation.

Here are three key topics to consider:

1. How do you know when it’s time for a change?
2. Is your website optimally organized and designed to be user-friendly?
3. How strong is your technical foundation?

How do I know it’s time for a change?

Do any of these problems sound familiar?

  • Low conversion rates
  • Site pages take more than 3 seconds to load
  • Site doesn’t work well on mobile or other devices
  • Updating content is a difficult and frustrating process
  • Users struggle to find what they need on the site or have shared negative feedback
  • Site crashes when updating
  • Too many bugs
  • Building new features is difficult or may not even be possible
  • Site is not loading on https and triggers security warnings

If your answer to any of these is yes, it’s time to take action.

But first … is it really that important for me to address these issues?

Yes! A website that isn’t working optimally can dramatically affect your bottom line. An out-of-date or poorly designed website can:

  • Damage your credibility. If your website loads slowly, is crowded with clutter or is just plain not working, you are sending the message that your company is unprofessional.
  • Make you appear out of touch. A dated website tells your customers you are behind the technological times, or worse – you don’t care enough to stay up-to-date.
  • Cost you customers. Every customer who leaves your site in frustration due to broken links, complex forms, slow pages or confusing navigation is a customer you won’t get back. If your competitors offer similar services and have a stronger website experience, your loss will be their gain.

Decision time. If you want to avoid the damage that a dated website can cause, you’ll need to either rebuild your site or update it. If you’re ready to take action, we can help you find the best and most cost-effective approach.

There are two primary things to consider when maximizing your site’s ROI: your user’s needs and the technology that drives your site. If you can identify and fix problems in both of these categories, you can most likely avoid a costly rebuild.

Venn diagram showing optimum website health at the intersection of smart user experience and strong tech foundation.

Next, we’ll dive a bit deeper into tips to help you level up your user experience and update your website technology without starting over from scratch. Consider it the non-surgical, diagnostic approach to improving your website experience right where it needs it the most.